

How to Install Android L SDK on Windows and Mac

Google has made the Android L Developer Preview version available for Nexus 5 and Nexus 7 2013 (Wi-Fi) allowing users to explore the new features of the upcoming major Android release. The Developer Preview contains SDK tools and system images for testing on an emulator.
With the SDK tools and system images for the aforementioned Nexus devices, users can start testing the apps of the latest Android platform before the official roll out.
Those who have neither the Nexus 5 nor the Nexus 7 can still enjoy the features of Android L on their Windows PC or Mac by installing Android L SDK Emulator.
Steps to Set Up and Install Android L SDK Emulator
Step-1: Download Android SDK installer. The tutorial uses the Windows version
Step-2: Install Android SDK files to any location on the computer
Step-3: Go to the installed location and run SDK Manager application
Note: If you have installed the Zipped version of SDK, go to the location where the zip archive is extracted.
Step-4: Wait for some time until the application is loaded and fetch all Android SDK packages
Step-5: Select the packages you wish to install. Select Android L Preview (API 20) and Android SDK platform-tools (under Tools), leave the "Extras"
Note: If you want to use Hardware acceleration on Intel x86 Emulator image then download Intel HAXM x86 from the Extras menu.
Step-6: Click on "Install packages..." A prompt will appear to confirm the packages that are chosen to install. Agree to the Licence information to proceed
Step-7: Click on Install button and wait until all packages download and install
Note: If you are going through this for the Android Emulator, select SDK Platform and ARM EABI v7a System Image and install them.
Once everything is installed, set up the Android Emulator to get Android L on the computer.
Steps to Set Up Android Emulator for Android L
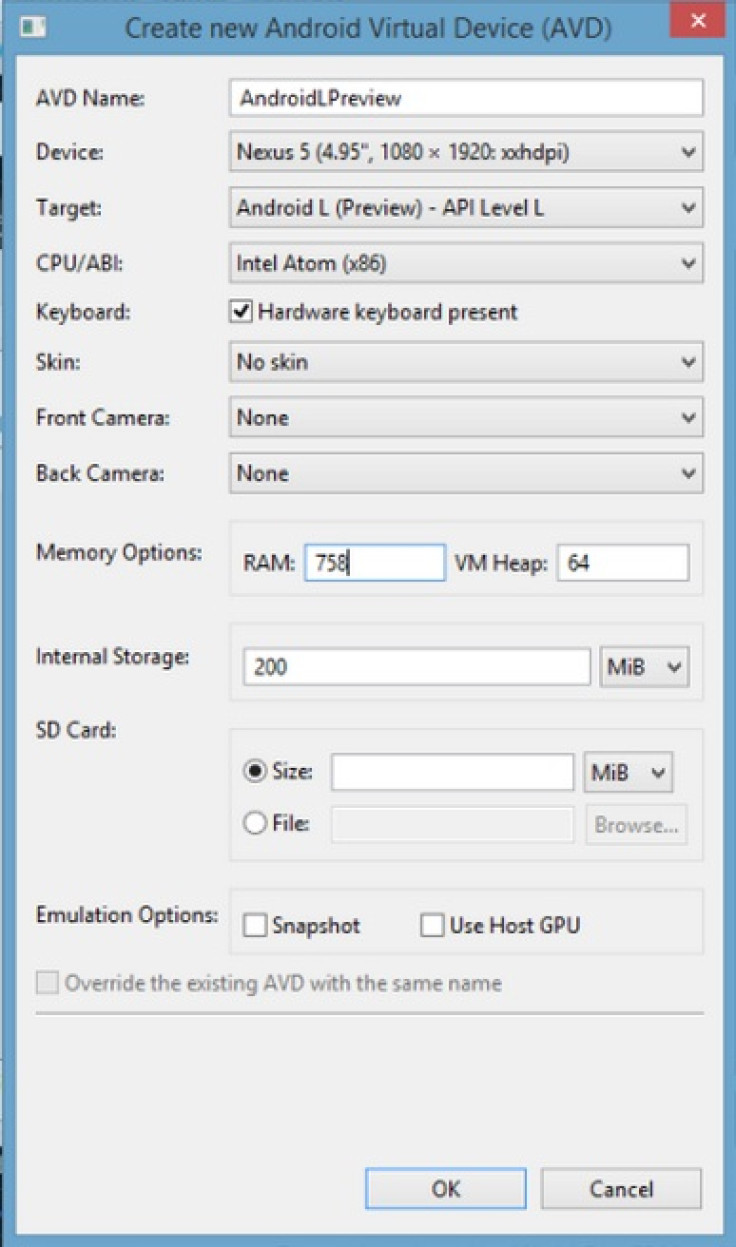
Step-1: Go to Android SDK folder and run AVD Manager. Now click on New and create a virtual device (Screenshot below)
Note: Use default value for Max VM application heap. As Android supports a variety of displays, you can use different devices by selecting options in the Device: dropdown menu.
You can tick Use Host GPU for better loading times and to solve screen issues. In case you are starting Virtual Device for the first time, start RAM less than 512MB.
Step-2: Click OK on the result windows
Step-3: Select the virtual device that is just created from the list and click on Start
Step-4: Click on Launch button. Do not change anything in the Launch Options
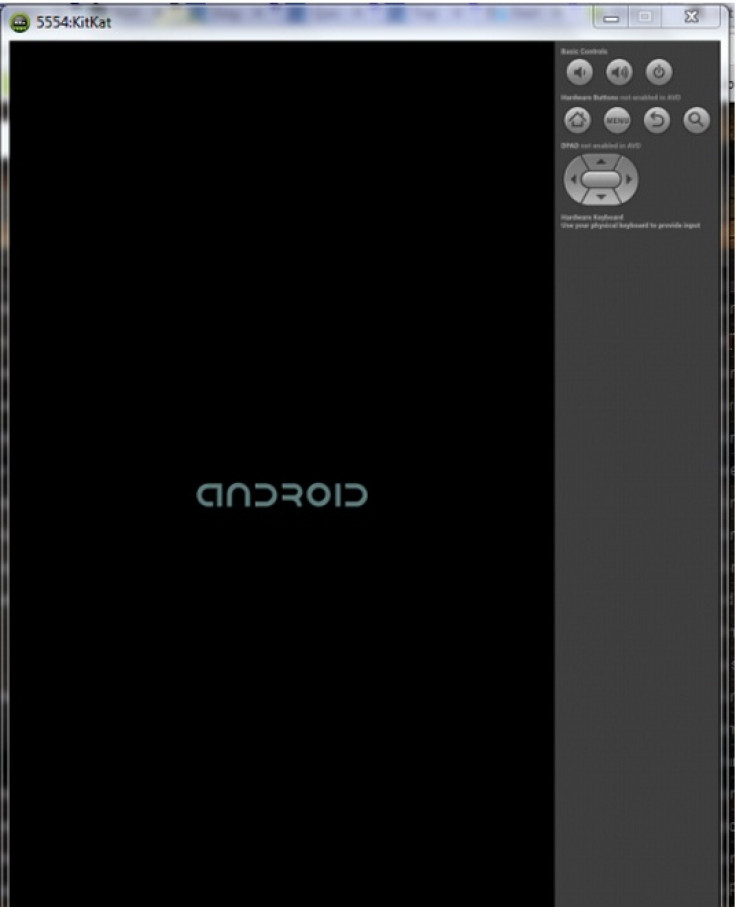
Step-5: The emulator will start after a few Command Prompt windows being displayed. Now you should see a screen with Android device will be booting up (as seen below). This will take about five minutes boot for the first time
Step-6: When the home screen of the device shows up, you can see a screen saying you have successfully completed the Emulator install
Now you should have Android L SDK installed on your computer and you can explore the Developer Preview version.
[Source: Team Android]
© Copyright IBTimes 2024. All rights reserved.


