

ParanoidAndroid ROM brings Android 5.1.1 Lollipop update for Xperia Z2 [How to]
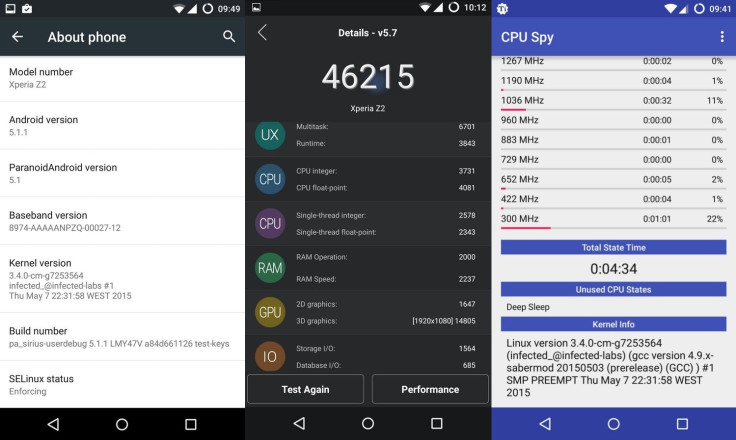
An unofficial build of ParanoidAndroid updated with Android 5.1.1_r4 version LMY47V is now available for the Xperia Z2 codenamed Sirius.
Senior XDA member, infected_, announced the availability of the new build (18 June) which bundles a few notable changes on the development thread. Check out the following list to know more about the changeslist, along with the basic features of ParanoidAndroid ROM that is based on the Android Open Source Project.
Features
- optimised (arm and thumb)
- Strict-aliasing
- Frame-pointers
- Graphite flags
- LinkTimeOptimizations (-flto) flags
- CPU arch specific flags (armv7-a-neon)
- Other flags to optimise even more the code
Changelog
- QS tiles arrangement is possible.
- Volume buttons control.
- Immersive Mode
- In-sync with AOSPA-L github
ROM details
- ROM OS version: 5.1.x Lollipop
- ROM kernel: Linux 3.4.x
- ROM firmware required: Latest TWRP recovery
- Based on: AOSP
- Status: Testing
Advanced users who wish to lay their hands on the test build of ParanoidAndroid on their Xperia Z2, may head over to the following installation guide.
Key points
- Before following the installation guide, create a backup of all important data of the phone using custom recovery.
- Enable USB Debugging on the phone to connect it with the computer and use Android SDK with it. [Navigate to Settings>> About phone. Tap on Build Number several times until a message appears saying 'You are now a Developer.' Now enable USB Debugging Mode by navigating to Settings>> Developer Options.]
- The Z2 should have above 80% battery charge to avoid power off during the process, which could damage the device.
- The phone should be rooted with the latest recovery system installed on it. Also, it should have an unlocked bootloader.
- As the ParanoidAndroid ROM is in its development stage, all features might not function properly.
- The latest ParanoidAndroid build works with Xperia Z2 only. Verify the model number of your device, as flashing this on any incorrect variant might brick the device.
- After flashing the ROM, if the device gets stuck on booting animation or experiences boot loop, then perform wipe cache partition and wipe dalvik cache a few times before rebooting the device.
- Once the ROM is installed, users are advised to give 10 minutes to the ROM after the device boots up for the first time for better user experience.
- IBTimes UK will not be held liable for any damage to the device.
Note: Ensure that ADB and Fastboot is configure on your PC.
How to update Xperia Z2 to Android 5.1.1 Lollipop using ParanoidAndroid ROM
Step-1: Download ParanoidAndroid ROM for Xperia Z2 on your PC. Extract the boot.img from zip file separately
Step-2: Download Gapps
Step-3: Connect and mount Xperia Z2 USB memory on the computer using USB cable
Step-4: Transfer the downloaded files to phone's storage. Ensure that files are in the SD card root not in any folder
Step-5: Copy the boot.img file to android-sdk-windows/platform-tools directory
Step-6: Switch off the phone
Step-7: Boot the phone into bootloader mode. For this press and hold Volume Up button while connecting it with USB cable. At this time you should see the phone's LED light turning blue and the phone will enter into bootloader mode
Step-8: Go to android-sdk-windows/platform-tools directory on the PC and open a command prompt (Shift + Right click>> Open Command Prompt)
Step-9: Execute the following command and press Enter
- fastboot flash boot boot.img
Now type in the following command
- fastboot reboot
Step-10: Enter recovery mode. Switch on the phone while pressing Volume Up or, Volume Down button for a few times until you see LED light turning pink or, any other colour
Step-11: Perform data wiping task. From recovery select wipe data/factory reset
Step-12: Perform a cache wipe by selecting wipe cache partition
Step-13: Navigate to advanced option and select wipe dalvik cache
Step-14: Return to the recovery menu and select install zip from sdcard>> choose zip from sdcard then head over to the location where you have saved the ParanoidAndroid ROM, select it and confirm installation on the next screen
Step-15: Repeat the similar procedure to install Gapps
Step-16: When the installation is completed, reboot the phone
More details about the ParanoidAndroid is available on XDA forum.
Via: Team Android
© Copyright IBTimes 2024. All rights reserved.


