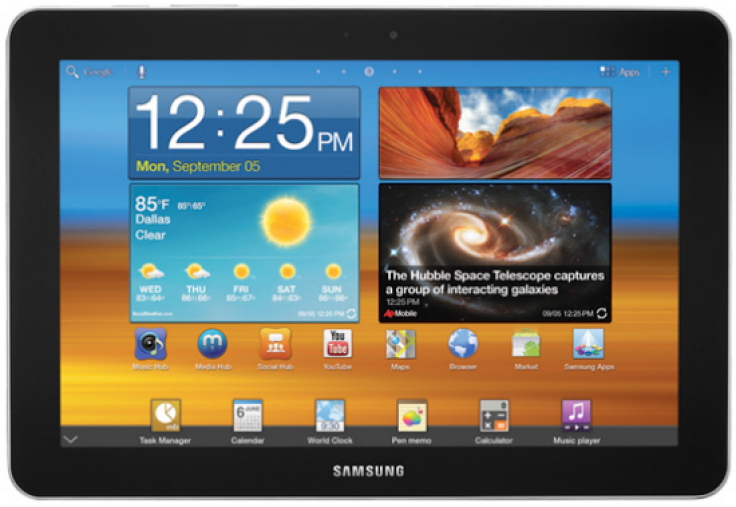
Samsung Galaxy Tab 8.9 P7310 Tastes Android 4.2.1 Jelly Bean with CyanogenMod 10.1 ROM [How to Install]

Samsung released the Galaxy Tab 8.9 P7310 in 2011 with access to Android 3.0 Honeycomb out-of-the-box. Given the tablet's powerful hardware configuration (dual-core 1 GHz Cortex-A9 processor and 1GB of RAM), the mobile operating system onboard seemed a bit underpowered.
Recently, the tablet maker released Android 4.0.4 Ice Cream Sandwich (ICS) official firmware for the ageing device. Discerning users would be disappointed that Samsung will not be releasing the latest Android 4.2 Jelly Bean firmware for the tablet anytime soon.
Nevertheless, Galaxy Tab 8.9 users can now relish the custom ROM Jelly Bean update with the release of Android 4.2.1 Jelly Bean firmware via CyanogenMod 10.1 (CM10.1) ROM. With due credit to CyanogenMod Team, the latest CM10.1 Jelly Bean firmware brings a plethora of new features including multi-user support, gesture typing, new quick settings option, lock-screen widget, new camera app, photo sphere, improved Google Now, new daydream feature and miracast display.
Features Tested and Working
Boots seamlessly
WLAN, Audio and Rotation features are fully functional
Storage and Cameras (front and rear) work flawlessly
Disclaimer
The instructions provided in this guide are meant for reference purpose only. IBTimes UK will not be held responsible if you damage or brick your device during or after firmware installation. Users are advised to proceed at their own risk.
Pre-requisites
- CM10.1 ROM and the instructions provided in this guide are applicable to the Samsung Galaxy Tab 8.9 P7310 model only and will not work on any other device. Verify your device's model number by navigating to Settings > About Tablet.
- IBTimes UK advises users to back up apps, important data and settings to avoid data loss while flashing the Android 4.2.1 CM10.1 ROM on the Galaxy Tab
- Verify that your tablet has at least 80 percent battery power to prevent unexpected device shutdown (due to battery drain) while installing the Android 4.2.1 Jelly Bean firmware
- Make sure that correct USB drivers are installed for Samsung Galaxy Tab 8.9 on your computer (Download USB Driver)
- Enable USB Debugging mode on your tablet by navigating to Settings > Applications > Development
- Ensure that the tablet is rooted with ClockworkMod Recovery (CWM) installed
NOTE: Restoring to CM10 or CM9 is not possible after the CM10.1 firmware installation, and CWM backup cannot be restored without using ADB.
Downloads
1. Download Android 4.2.1 CM10.1 for Samsung Galaxy Tab 8.9 P7310
2. Download Google Apps (GApps)
How to Install Android 4.2.1 Jelly Bean on Samsung Galaxy Tab 8.9 P7310 with CM10.1 ROM
1. Connect your Samsung Galaxy Tab 8.9 P7310 to the computer with the original USB cable.
2. Copy downloaded ROM zip file to the root folder on your tablet. Important: Do not extract any file.
3. Disconnect the USB cable from computer and then power off your tablet.
4. Boot into Recovery mode. To do so, press and hold Power and Volume Up buttons together until Samsung Galaxy Tab 8.9 logo appears on screen. When you see the logo, release the Power button but continue holding Volume Up button for a few more seconds until the device boots into CWM Recovery screen. NOTE: Use Volume keys to navigate and Power button to select an option in Recovery.
5. Take a Nandroid backup of your current ROM so that you can restore it later if something goes wrong with the new ROM. To do a backup, choose Backup and Restore and then hit Backup on next screen. Return to main recovery menu once backup is done.
6. Perform a full data wipe. To do so, click wipe data/factory reset and then hit Yes on next screen to confirm. Wait for a few minutes until the data wipe process completes.
7. Choose Install zip from sdcard and click Choose zip from sdcard. Now, locate the CM10.1 ROM zip file that you copied to your tablet earlier in Step 2 and select it by tapping Power button. Confirm ROM installation by tapping Yes to confirm and the installation will begin.
8. After the ROM is installed, repeat step 7 but choose GApps file instead of ROM zip to install the Google apps package.
9. Perform a full data wipe again. To do so, hit wipe data/factory reset and click Yes on next screen to confirm. Wait for a few minutes until the data wipe process completes.
10. Once the data wiping process is done, return to the main recovery menu and tap Reboot System Now to reboot the tablet into customized Android 4.2.1 CM10.1 ROM. The first boot may be time-consuming (takes about 5 minutes). So, leave it alone.
Android 4.2.1 Jelly Bean based CM10.1 ROM is now installed and running on your Samsung Galaxy Tab 8.9 P7310.
[Source: Android Jinn]
© Copyright IBTimes 2024. All rights reserved.


