Update Galaxy S3 I9300 to Android 4.2.1 Jelly Bean with Vanilla RootBox ROM [How to Install]

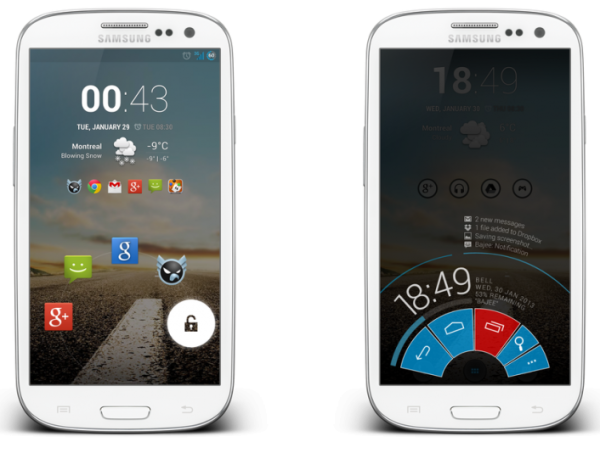
Galaxy S3 I9300 users can now enjoy the latest custom ROM Jelly Bean update with the release of Android 4.2.1 Vanilla RootBox ROM. The ROM brings a mix of select Jelly Bean features borrowed from popular custom firmware such as CyanogenMod 10.1 (CM10.1) and Android Open Kang Project (AOKP).
The Vanilla Rootbox custom ROM is reportedly fast, stable and clean without any bloatware for a stock-like (pure) Android experience. The ROM is touted to be extremely lightweight and designed from RootBox sources. As the ROM is still under development, it may harbour a few untested bugs or broken features. Nevertheless, RootBox ROMs are known to come in stable builds and seem to be ideal for daily use.
Key Features of Android 4.2.1 Vanilla RootBox ROM
- Based on Jelly Bean 4.2.1 and built from RootBox Sources
- AOKP Features
- CM Profiles
- Per App DPI
- Per App Tablet UI
- Per App Language
- OTA Updates - Goo Manager
- Navigation Bar Colour
- Camera: Save to external memory
- Phone: Advance Phone Settings (Vibrate on Answer, Every 45 Seconds, On Hangup and On Call Waiting)
- Phone: Noise Suppression
- MMS: Message rate alerts (ModifySMS messagelimit for alert)
- MMS: Fully Customizable MMS Theme
- MMS: Soft Keyboard Type (Emoji, Enter to Send, Enter for a New Line)
- Optionto control cursor in text fields using volume keys
- Home button call answer (AccessibilityOption)
- Variable size pattern lockscreen
- RootBox Settings
- LockClock (Chronus)
- Launch Music app on Headset connection
- Pie (Paranoid Android)
- Option to disable sound when adjusting volume
- Lockscreen Shortcuts (Paranoid)
- Lockscreen Targets (CM)
- Screen Security Features (Unlock options)
- Expanded Desktop
- Hardware Keys Remapping
- Lockscreen Hardware Keys Remapping
Key Points to Note
- Vanilla RootBox ROM and the instructions provided in this guide are applicable to the international variant - Galaxy S3 I9300 model only. It will not work on any other device. Verify your device's model number by navigating to Settings > About Phone.
- Verify that correct USB drivers are installed for your Galaxy S3 on the computer. Download Samsung Galaxy S3 I9300 USB drivers.
- Back up important data and settings on the phone including apps, SMS, contacts, Bookmarks, APNs (GPRS, 3G and MMS) and other internet settings. It is recommended to backup datausing a custom recovery tool such as ClockworkMod (CWM) or TWRP, which helps create a complete image of your phone setup rather than just the user-files. Avoid using either Samsung KIES or ROM manager for data backup, as they have known issues with custom ROM and may inadvertently damage or brick your device.
- Make sure that USB Debugging mode is enabled on the phone by navigating to Settings > Developer Options (if phone is srunning Android 4.0 or later). Else go to Settings > Applications > Development (if device is running Android 2.3.6 or earlier). Otherwise, if the device is running Android 4.2, then perform the following steps:
- Go to Settings > About Phone
- Scroll down to the bottom and select Build Number.
- Now, tap Build Number seven times to unlock Developer Options under Settings. Then click on the checkbox to enable USB Debugging mode.
- Ensure that the phone is rooted with CWM recovery installed on it.
- Perform a Dalvik Cache Wipe before continuing from recovery mode.
- Samsung KIES will not recognise the phone after installing the Vanilla RootBox ROM, as it is a custom release.
- The instructions provided in this guide are meant for reference purpose only and do not cover any warranty claims involving device damage or issues arising out of installing the custom ROM. Users should proceed at their own risk.
How to Install Android 4.2.1 Jelly Bean with Vanilla RootBox ROM on Galaxy S3 I9300
Step 1 - Download Android 4.2.1 Vanilla RootBox ROM and Google Apps for Galaxy S3 on your computer.
Step 2 - Connect and mount the Galaxy S3 USB mass storage on computer with the USB cable.
Step 3 - Copy the downloaded Android 4.2.1 ROM zip and Google Apps zip files to the root folder on the phone's SD card.
Step 4 - Power off the phone and disconnect its USB cable from computer.
Step 5 - Turn on the phone while pressing and holding Volume Up, Home and Power buttons together to boot into Recovery mode.
Step 6 - In CWM recovery, perform a full data wipe first. Then navigate to Flash zip from SD card option and hit Power button to select it.
Step 7 - Tap the Power button again and click Choose zip from SD card.
Step 8 - Use volume keys to navigate to Android 4.2.1 ROM zip file that you copied earlier to the phone's SD card and select it by tapping Power button. Confirm the ROM installation on next screen and the installation procedure should begin.
NOTE: Repeat this step for installing Google Apps as well.
Step 9 - Once both the ROM and Google Apps are installed, hit Go Back and reboot the phone by tapping Reboot System Now in the Recovery menu. The phone will reboot now and the first boot might take about 5 minutes to complete. So, leave it alone.
Galaxy S3 is now running Android 4.2.1 Vanilla RootBox Jelly Bean ROM. Go to Settings > About Phone to verify the firmware version installed.
[Source: Team Android]
© Copyright IBTimes 2025. All rights reserved.


