

How to enable Multi-Window mode for Android M Developer Preview on Nexus 5, Nexus 6 and Nexus 9


In line with earlier references found in Android code commits, it is now possible to enable Multi-Window mode on your device running Android M Developer Preview build MPZ44Q.
For the first time in history, this feat has been ported to stock Android firmware with due credit to the release of Developer Preview for Android M by Google.
Now the only catch is that it is an experimental function that requires the user to fiddle with the build.prop file, just to unlock the feature in developer options.
As its name implies, the multi-window feature offers the ability to view two or more windows side-by-side. This function is accessible through the recent menu by clicking the new icon appearing to the left of the X icon, reports Android Authority.
The folks at Android Authority have also confirmed that the Multi-Window feature of Android M works just fine on the Nexus 5, without any instances of app crashing or other issues marring the user experience.
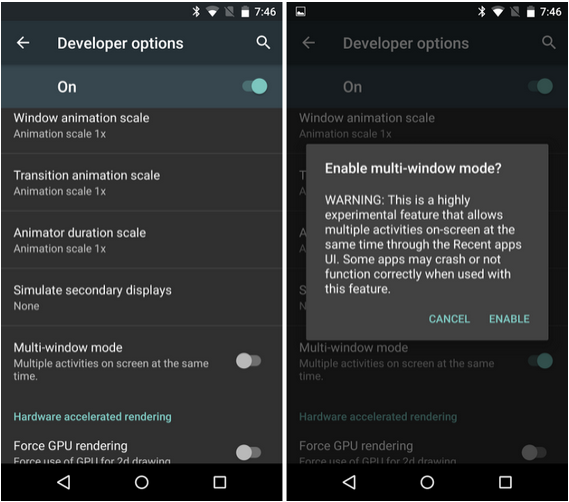
Nevertheless, when you try to enable this feature you will be presented with the usual warning message as seen in the screenshot below:
Those who are willing to go the extra mile of taking some risk can follow the step-by-step guide posted below to enable this feature on their device, which is running the new Android M Developer Preview update.
Steps to enable Multi-Window mode on Android M Developer Preview build MPZ44Q
- Install the latest Android M ADB drivers or the older drivers from the link here.
- Install TWRP recovery for your device: Nexus 5, Nexus 6 or Nexus 9.
- Boot your phone into recovery mode as follows:
- Turn off the device.
- Press and hold Volume Down, Volume Up and Power button together to reboot to fastboot mode.
- Use volume buttons to locate Recovery option and then tap Power button to select and it should automatically boot into Recovery mode.
- Connect your device to computer via USB cable.
- In TWRP, select Mount, and then check System option. Now you will be able to access build.prop file from the device.
- Once you have installed ADB on the PC, create a new folder on the desktop and name it as "multi-m".
- Open the folder multi-m, and launch a command (cmd) window in that folder. Right click on the empty space inside the folder while holding Shift button and then choose 'Open command window here'.
- This will open the build.prop file in system partition.
- Now the build.prop file will be accessible via the folder multi-m. Open the file with Notepad++ text editor. Without closing the command window or powering on the phone, let the phone remain connected to the computer.
- Locate the ro.build.type line in the build.prop file. For instance it will be line no. 14 in build.prop for Nexus 5.
- You should find the text user after that. Just change it to userdebug.
- Save the file, and close the Notepad++. Now we will add the edited build.prop back into device's system partition by replacing the old one and setting the permissions back.
- 14. Return to the command window and then copy/paste the following command and then hit Enter key: adb push build.prop /system/
- We can now set permissions via ADB shell. To do this, type adb shell and then hit Enter key.
- Next, type cd system and hit Enter again.
- Now set permission on the build.prop file we pushed to system in step 14. Copy and paste the following command and then hit Enter key: chmod 644 build.prop
- Exit adb shell. Type exit and then hit Enter key.
- On the device, uncheck the System option in mount.
- Return to TWRP main screen, and tap Reboot > System. When prompted for SuperSU installation, hit 'Do not Install' as SuperSU is currently incompatible with Android M.
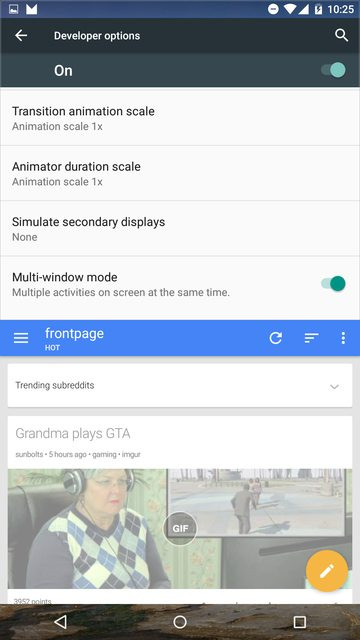
- Once the device boots up, go to Settings > Developer options > Drawing section and find the option Multi-window mode. Enable this option via toggle button and you are done.
8. Then copy/paste the following command and hit enter key: adb pull /system/build.prop
[Source: Android Soul via XDA]
© Copyright IBTimes 2025. All rights reserved.
- MOST READ


