Root Galaxy Note 2 GT-N7100 on Android 4.1.2 XXDMA5 Official Jelly Bean Firmware [Tutorial]

Galaxy Note 2 users, who have upgraded their device to the latest official Jelly Bean firmware Android 4.1.2 N7100XXDMA5, would lose root access soon after the update. Hence, it is imperative to the root the device again to regain full system access for installing third-party root-apps, custom ROMs and powerful system tweaks.
IBTimes UK brings a step-by-step guide to root Galaxy Note 2 GT-N7100 on the latest Android 4.1.2 XXDMA5 official firmware using CF-Auto-Root with ODIN.
Key Points to Note
- XXDMA5 official firmware and the instructions given in this guide are applicable to the Galaxy Note 2 GT-N7100 model only and will not work on any other device. Verify your device's model number by navigating to Settings > About Phone.
- Back up important data and settingson the phone and ensure the device has at least 80 percent battery charge.
- Verify that correct USB drivers are installed for Galaxy Note 2 on the computer. Download Samsung Galaxy Note 2 GT-N7100 USB drivers.
- Ensure that USB Debugging mode is enabled on the phone by navigating to Settings > Developer Options or Settings > Applications > Development.
- The instructions provided in this guide are meant for reference purpose only. IBTimes UK will not be held liable if the device is damaged or bricked in the process of installing the root package. Users should proceed at their own risk.
Downloads
How to Root Galaxy Note 2 N7100 on Android 4.1.2 XXDMA5 Official Jelly Bean Firmware

1. Extract the downloaded CF-Auto-Root zip file to get a .tar.md5 file in the extracted folder.
2. Extract Odin zip file to get Odin3 v3.07.exe along with few other files.
3. Switch off the phone and wait for vibration (about 5 to 6 seconds) to confirm complete device shutdown.
4. Boot the Galaxy Note 2 phone in Download Mode by pressing and holding Volume Down and Home buttons together, while tapping the Power button. A "Warning!" message pops-up on screen; hit Volume Up button to enter Download Mode.
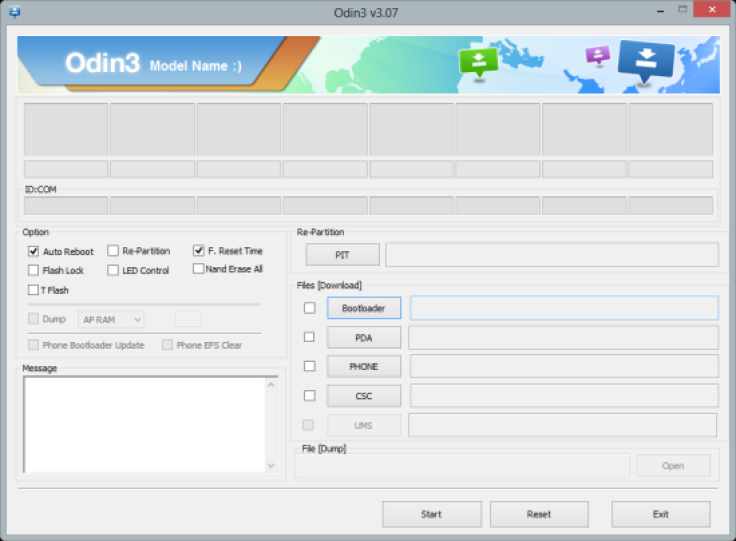
5. Launch Odin3 v3.07.exe (check Step 2) as an Administrator, as Admin privileges are required to complete the root installation process.
6. Connect the phone to computer with USB cable. A message reading "Added!!" appears in Odin's message box at the bottom left of screen. If the message fails to appear, just try another USB port (preferably the one at the back of computer). If all else fails then just reinstall the USB drivers for the phone on computer. When the successful "Added!!" message appears in Odin, proceed to the next step. At this point, the COM port with a number turns Yellow if you successfully added the device.
7. Choose the following files in Odin using respective command buttons:
- Click the PDA button, and choose CF-Auto-Root-t03g-t03gxx-gtn7100.tar.md5.
8. In Odin, enable Auto Reboot and F. Reset Time options.
9. Verify that everything in step 7 and step8 is done correctly. Then hit the START button to begin the flashing process.
10. Once the root package is flashed completely, the phone will reboot and a PASS message with green background appears in the left-most box at the very top of Odin. Now, just unplug the USB cable to disconnect the device from computer.
Galaxy Note 2 N7100 is now rooted on Android 4.1.2 N7100XXDMA5 official Jelly Bean firmware. You can now install apps that require root access.
[Source: Android Jinn]
© Copyright IBTimes 2024. All rights reserved.


