

Root Sony Xperia Z2 D6502/D6503 and Install CWM Recovery

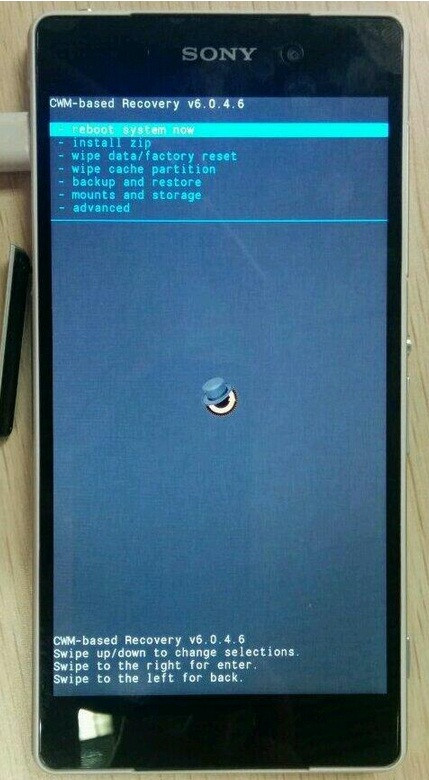
Sony's new flagship smartphone, Xperia Z2, which is waiting for its market roll-out, has been rooted, with due credits to recognised XDA developer, DooMLoRD. The developer has released a CWM-based recovery v6.0.4.6 for the Xperia Z2. Below are the features of the recovery file.
1) Standard CWM recovery 6.0.4.6 - TOUCH RECOVERY!
2) Kernel is insecure (ro.secure=0)
3) ADB debugging is enabled by default in OS
4) Those who are experiencing very slow backup in CWM, perform this tutorial.
Head over to the development thread to know more about the CWM-based recovery 6.0.4.6.
Xperia Z2 users who wish to install CWM recovery and root the device using the recovery mode, may follow our step-by-step guide.
IBTimes reminds its readers that it will not be held liable for any damage to the device. Besides, users are expected to verify their devices meet following requirements.
Pre-requisites
1) Install USB Driver for Sony Xperia Z2 to transfer files between the Android device and the computer.
2) Enable Developer Options on the Xperia Z2. For this, go to Settings>> About phone>> now scroll down and tap on Build number seven times to enable Developer options.
3) Enable USB Debugging mode. Navigate to Settings>> Developer options>> tick the USB Debugging checkbox under Debugging section.
4) As the tutorial might wipe out all data of the phone, create a backup. If the device is having any custom recoveries such as ClockworkMod or, TWRP then backup data using the recovery.
5) If the Android device powers off due to lack of battery while the rooting process, it could damage the device. Therefore, the Xperia Z2 should have charge above 80% battery charge.
6) The bootloader of Xperia Z2 should be unlocked.
7) The device will lose manufacturer's warranty once the root method is installed.
8) The CWM recovery filer and the root file works with Sony Xperia Z2 D6502 and D6503. As applying these on any incorrect variant might brick the device, verify the model number of Xperia Z2 by navigating to Settings>> About phone>> Model number.
9) The Xperia Z2 should be running Android 4.4.2 Kitkat with build number 17.1.A.2.36 –v01 or, ROM based on the same firmware.
Download CWM recovery
File name: Z2_DooMLoRD_AdvStkKernel_FW-4.4.2_17.1.A.2.36.img
How to install CWM recovery on Sony Xperia Z2
Step-1: Connect the Xperia Z2 to the computer using USB cable and when a pop-up careen appears asking you to Allow USB Debugging for the computer, ensure that you have ticked the checkbox and tap OK
Step-2: Extract the CWM recovery file for the Xperia Z2 using any extracting tool. You should get the following files and a folder
api (folder)
1-click-cwm-recovery-installer.bat
adb.exe
AdbWinApi.dll
AdbWinUsbApi.dll
fastboot.exe
Z2_DooMLoRD_AdvStkKernel_FW-4.4.2_17.1.A.2.36.img
source.propertiesStep-3:
Step-3: Double click to run the 1-click-cwm-recovery-installer.bat file and follow the on-screen instructions (Like press any key to continue) to install CWM recovery on Xperia z2
Step-4: When the CWM recovery is installed, the phone will reboot automatically
Note: If the script gets stuck on for more than a minute or so, this means proper drivres are not installed on the computer for the Xperia Z2.
When the Xperia Z2 boots up successfully, it should be having CWM recovery installed.
How to root Sony Xperia z2 with SuperSU
Step-1: Download SuperSU root zip file for Xperia Z2
Download link- file name: UPDATE-SuperSU-v1.94.zip
Step-2: Boot the Xperia Z2 into recovery mode. For this first switch off the phone. Switch it back on and when the phone's LED notification light turns pink (or, any other colour), start pressing either Volume Up or Volume Down button for a couple of times to boot into recovery mode
Step-3: In recovery mode, create a Nandroid Backup. It is optional but very important to do if something goes wrong, you can restore to current status easily. To make Nandroid backup navigate to Backup and Restore then select Backup. Return to the recovery menu once the process is completed
Step-4: Select Install zip>> Choose zip from sdcard. Now navigate to the location where you have saved the SuperSU root package. Select it and confirm installation
Step-5: when the installation process is completed, return to the main recovery menu reboot the phone by selecting reboot system now
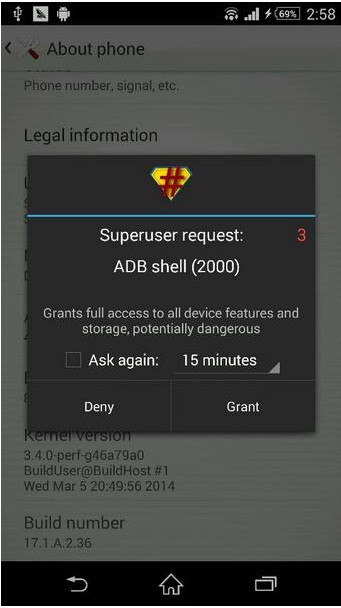
When the Xperia Z2 boots up, it should have been rooted successfully with the SuperSU root package. In order to verify the root access on the phone, download Root Checker app from Play Store.
Install BusyBox
Users are highly recommended to install busybox after rooting the smartphone. Head over to the Android Play store and download the busybox installer. Once the installer is downloaded, install busybox in /system/xbin. Then reboot the phone.
[Source: Android Soul]
© Copyright IBTimes 2025. All rights reserved.
- MOST READ


