Install Android 4.3 Jelly Bean on PC [TUTORIAL] [VIDEO]
Google has released Android 4.3 Jelly Bean update, with build version JWR66V, for its Nexus devices such as Galaxy Nexus, Nexus 4, Nexus 7 and Nexus 10.
The Android 4.3, which is an upgrade to Jelly Bean, introduces a host of new features including Restricted Profiles for tablet, which enables users to manage per-user access to apps and content. Besides, Android 4.3 adds Bluetooth Smart support (also known as Bluetooth Low-Energy), accelerated 3D graphics with OpenGL ES 3.0, Dial pad autocomplete and improved support for Herbew, Arabic, Hindi and more.
Users can now experience the same Android 4.3 on their personal computers (PC). Thanks to Learn2crack for sharing an easy tutorial, which allows users to install Android 4.3 on their PCs in just 10 steps.
Those who wish to update their PCs to Android 4.3 may follow our step-by-step guide. IBTimes UK reminds its readers that it will not be held liable for any damage to the device.
Files required to download
Oracle VM VirtualBox (download the latest version of VirtualBox)
Android x86 4.3 Image
Steps to install Android 4.3 Jelly Bean on PC
Step-1: Install VirtualBox on the computer
Step-2: Open VirtualBox and select New. In the dialogue box enter the name as desired then select a) Type: Linux
b) Version: Other Linux
and select Next
Step-3: In the next dialogue box enter the memory size as desired. Then select Next
Note: Minimum 1GB is required for Jelly Bean.
Step-4: In the next dialogue box select create a virtual hard drive. Then select VDI and select fixed or dynamically allocated accordingly and create the virtual drive
Note: Minimum 1GB is required for installation.
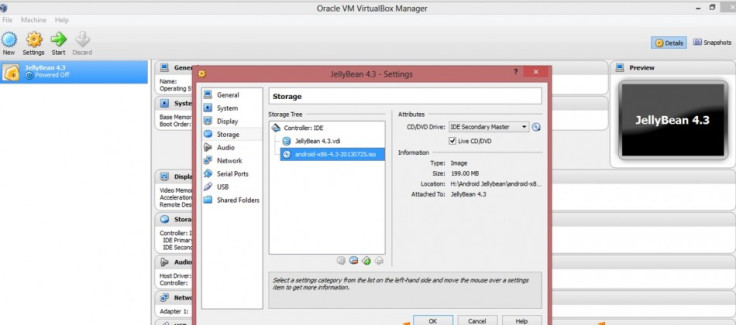
Step-5: Select Virtual device and select Settings, a dialogue box will appear. In the dialogue box select
a) Storage>> Storage Tree>> Empty
b) In the attribution section select the Android 4.3 iso file downloaded earlier and check Live Cd/DVD, then click OK
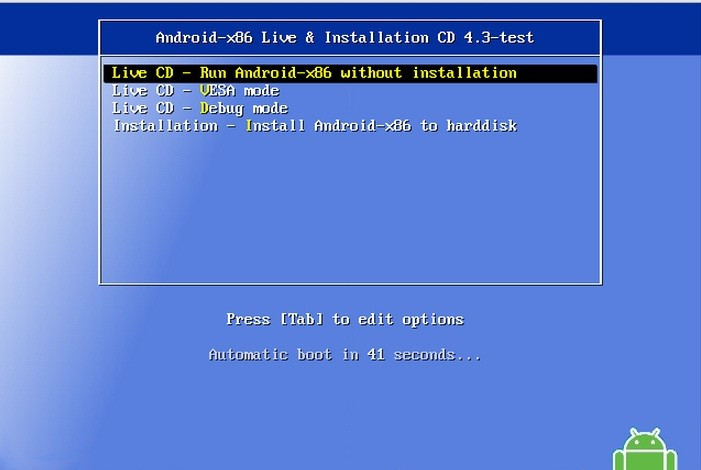
Step-6: Start the virtual device. On the screen select install Android-x86 to harddisk
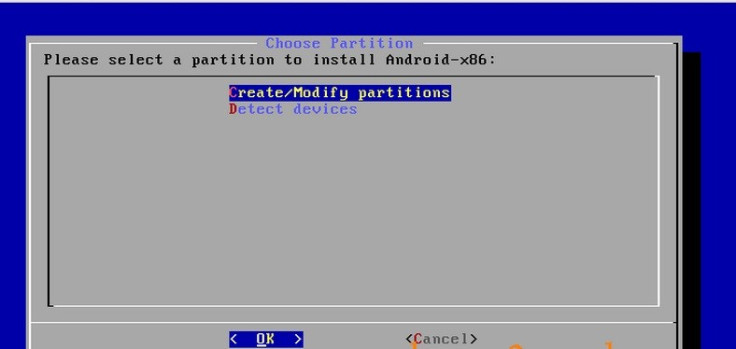
Step-7: On the next screen select Create/Modify Partition
Step-8: Then create a new primary bootable partition and select write. After writing is finished, select quit
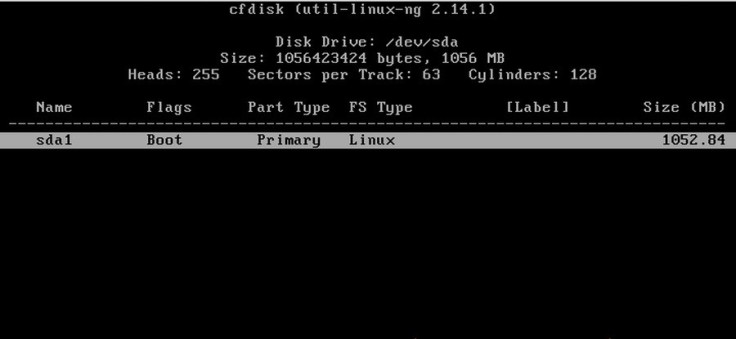
Step-9: Then install android in sda1 and select type as ext3 then choose Yes for installation
Step-10: After installing remove live iso from VirtualBox and reboot. Now boot the computer into Android 4.3
As the computer boots up successfully, it should be running on Android 4.3 Jelly Bean.
[Source: Learn2crack]
© Copyright IBTimes 2025. All rights reserved.
- MOST POPULAR IN Technology