How to Install Android Wear SDK on Computer (Windows/Mac)
Recently Google senior vice president for Android, Chrome and Apps, Sundar Pichai had announced Android Wear, the new mobile operating system tailored for smartwatches.
Soon after this, Motorola and LG announced their first smartwatches running Android Wear. As of now users will not be able to get their hands any of these wearable devices powered by Android Wear as the devices are not rolled out to the market yet.
However, those who wish to experience Android wear on their computer without a smartwatch, may follow our step-by-step guide.
Note that it is just an emulator, which leaves out the main features, that will allow users to previews the basic features of Android Wear. Those who wish to have the full experience should wait until the release of the wearable devices running Android Wear.
IBTimes UK reminds its readers that it will not be held liable for any damage to the device, therefore proceed at your own risk.
Note: Install Android SDK (Android 4.4.2 KitKat) on the computer using the tutorial here. The installation of Android Wear SDK should be only after installing and setting up the main Android SDK.
How to install Android Wear SDK on computer
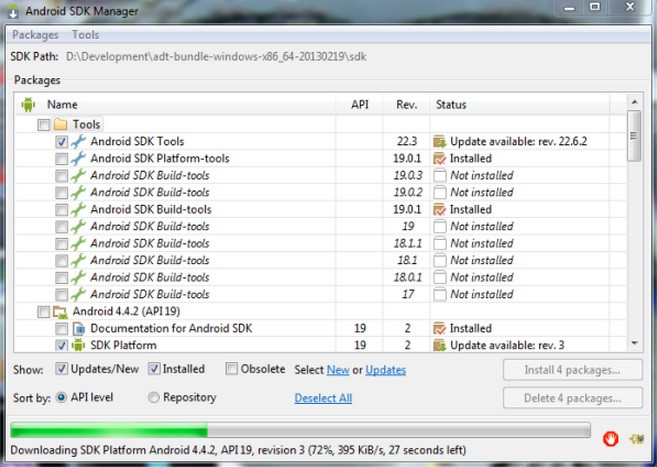
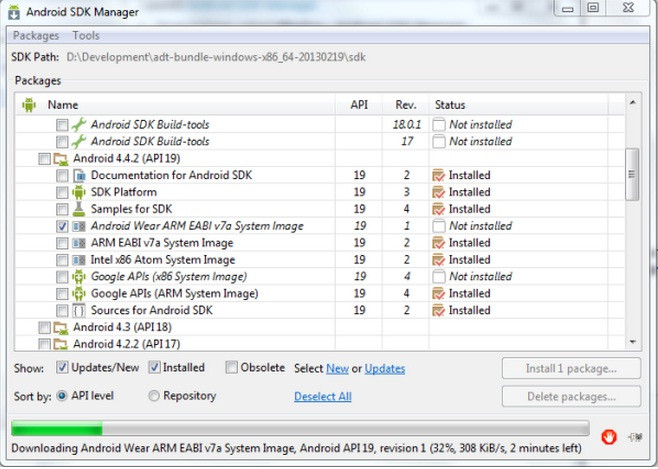
Step-1: Update your Android SDK to 22.6 or higher for the Android Wear image to be visible in your Android SDK Manager. Update it by opening SDK Manager and installing all the updates available
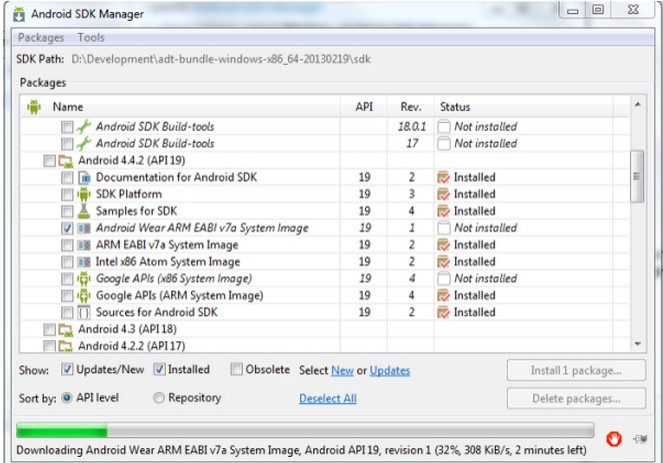
Step-2: Close Android SDK Manager window after it is updated and open it again. You should see Android Wear ARM EABI v7a System Image pop up under the Android 4.4.2 (API19) folder. Select it and click on Update
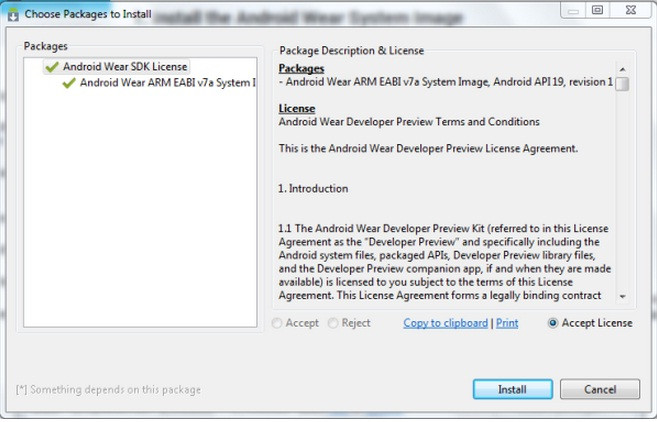
Step-3: A confirmation windows should appear now. Select Accept License and click Install
Step-4: Wait for some time until System Image is downloaded. When the download is completed, it will automatically install
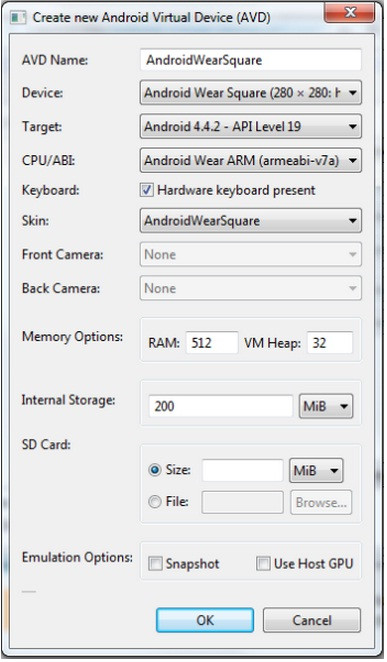
Step-5: Run AVD Manger present in your SDK installation folder. Click on New and create a virtual device using the following details shown in the screenshot
Note: The tutorial uses a Square display, however you can create a round one by selecting Android Wear Round in Device: Dropdown. Use default value for Max VM application heap.
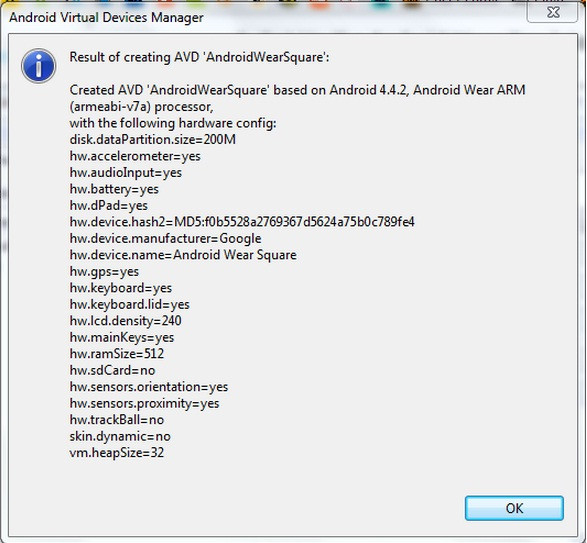
Step-6: Click OK on the result window
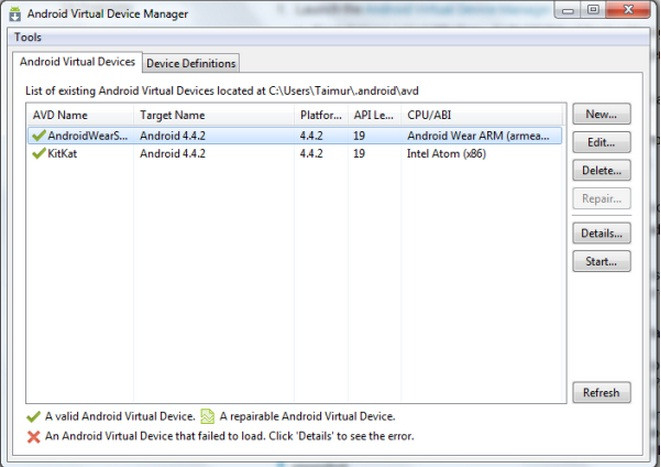
Step-7: Select the virtual device which you created now from the list and click on Start
Step-8: The emulator will start after a few Command Prompt windows flicker and then you should see the following screen wherein Android Wear will be booting up
Note: This step might take a few minutes to start. There is nothing to worry.
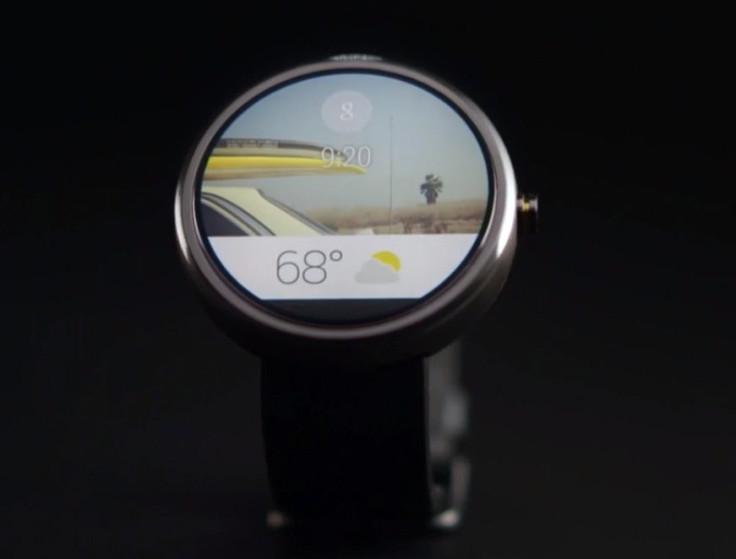
Step-9: When the device is on, you should see the screen, which indicates that you have successfully completed the Emulator install.
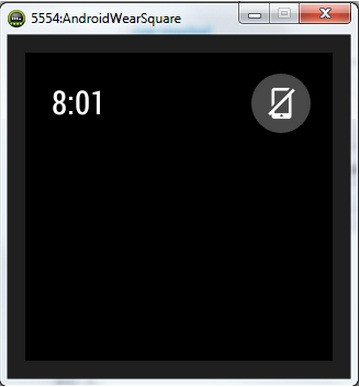
You have now successfully installed Android Wear SDK on the computer.
[Source: Team Android]
© Copyright IBTimes 2025. All rights reserved.
- MOST POPULAR IN Technology