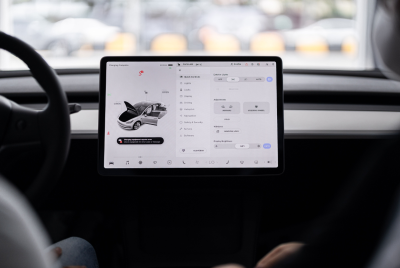
How to Make Google Voice Phone Calls on Your Nexus 7 [GUIDE]

![How to Make Google Voice Phone Calls on Your Nexus 7 [GUIDE]](https://d.ibtimes.co.uk/en/full/297004/how-make-google-voice-phone-calls-your-nexus-7-guide.jpg?w=590&f=45c3d327a357166cbab3292973c4c2c6)
Google Nexus 7 is not designed to make or receive phone calls like its older sibling Galaxy Tab from Samsung, nor does it support features like a smartphone. It is still possible to create a Google account for making and receiving calls on your Nexus 7 absolutely free of cost, thanks to Google Voice.
Because of the efforts of XDA senior member bongostl, it is now possible for a casual user to modify the Nexus 7's framework settings using a framework editor tool. The use of this tool is limited to work only on the stock ROM, as the procedure requires modding specific system files. The method requires root access to the tablet, besides using a dialler app - voice+ - to connect via Google Voice for making calls.
The incoming calls are handled by SIP app such as CSipSimple, which requires you to set up a call number and perform rooting through online services like ipkall or callcentric.
Here is a step-by-step guide to enabling Google Voice phone calls on your Nexus 7, assuming your device is already rooted. Users could follow our step-by-step guide posted here for rooting manually or the other guide posted here for using the Nexus 7 all-in-one toolkit (for one-click rooting).
How to Make Google Voice Phone Calls on Your Google Nexus 7
Step 1: Set up a free VoIP account using a service like CallCentric.com. Then, set up a free incoming phone number from a service such as ipkall.com to connect to your SIP account.
Step 2: Now, setup a SIP app on your Nexus 7 device by downloading and installing CSipSimple from Google Play Store. Then, connect it with your CallCentric account (note that your username is your contact number on CallCentric).
Step 3: Open Google Voice app on your computer, go to settings and add a new number - the same number you registered with ipkall - to your Google Voice account from settings. You will then hear a test ring from the app on your tablet. You can now receive calls on your Nexus 7.
Having done this, you should work on setting up outgoing calls.
Step 4: Download and install Voice+ from Play Store and link it with your Google Voice account. Also download ExDialer from Play Store, which will be used to enter the number you wish to call to.
Step 5: Download developer bongostl's Framework-res Editor from here and unzip or extract it using suitable software like 7-zip.
Step 6: Using a root-enabled file explorer like File Expert, navigate to /system/framework and you will find framework-res.apk. Copy this file and place it under the place-framework-res-here folder that you extracted in Step 5.
Step 7: Launch the RunMe application which you extracted in Step 5 by double-clicking it and recompile your framework-res.
Step 8: Navigate to files-to-edit folder and look for an APK file called "framework-res.apk". Now, click on res > values and open up the bools.xml file.
Step 9: Locate the line that says line false and change value 'false' to 'true'. Save and close this file.
Step 10: Once again launch RunMe and choose option 2 to compile a new APK.
Step 11: Now choose option 3 ans sign the APK.
Step 12: Finally, choose option 4 to create an update.zip file.
Step 13: Now, copy this update.zip file directly to sdcard directory on your Nexus 7.
Step 14: Reboot into ClockworkMod Recovery (which you should have already done if you have rooted your Nexus 7).
Step 15: Browse to install zip from sdcard > select zip from sdcard and click update.zip.
Step 16: Now, tap reboot system now and allow the changes to take effect.
You should now be able to send and receive calls from your Nexus 7.
[Source: XDA Developers]
© Copyright IBTimes 2025. All rights reserved.
- MOST POPULAR IN Technology