

Android M Developer Preview 2 hits Nexus 5, Nexus 6, Nexus 9 and Nexus Player: How to download and install

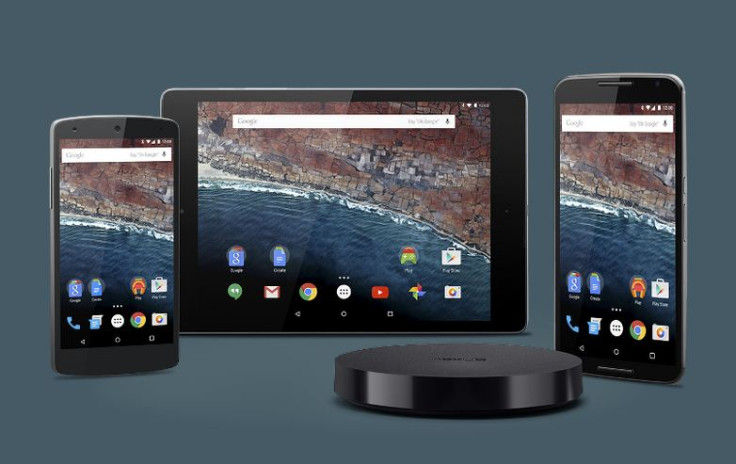
Google has just rolled out the latest Developer Preview 2 build MPZ79M for Android M on a slew of Nexus devices including the Nexus 5, Nexus 6, Nexus 9 and Nexus Player, wherein the second preview update adds some much needed bugfixes and performance improvements.
The second preview update basically addresses a host of permission issues pertaining to fingerprint scanner API, remote Bluetooth/WiFi MAC, WiFi (Windows) and Bluetooth.
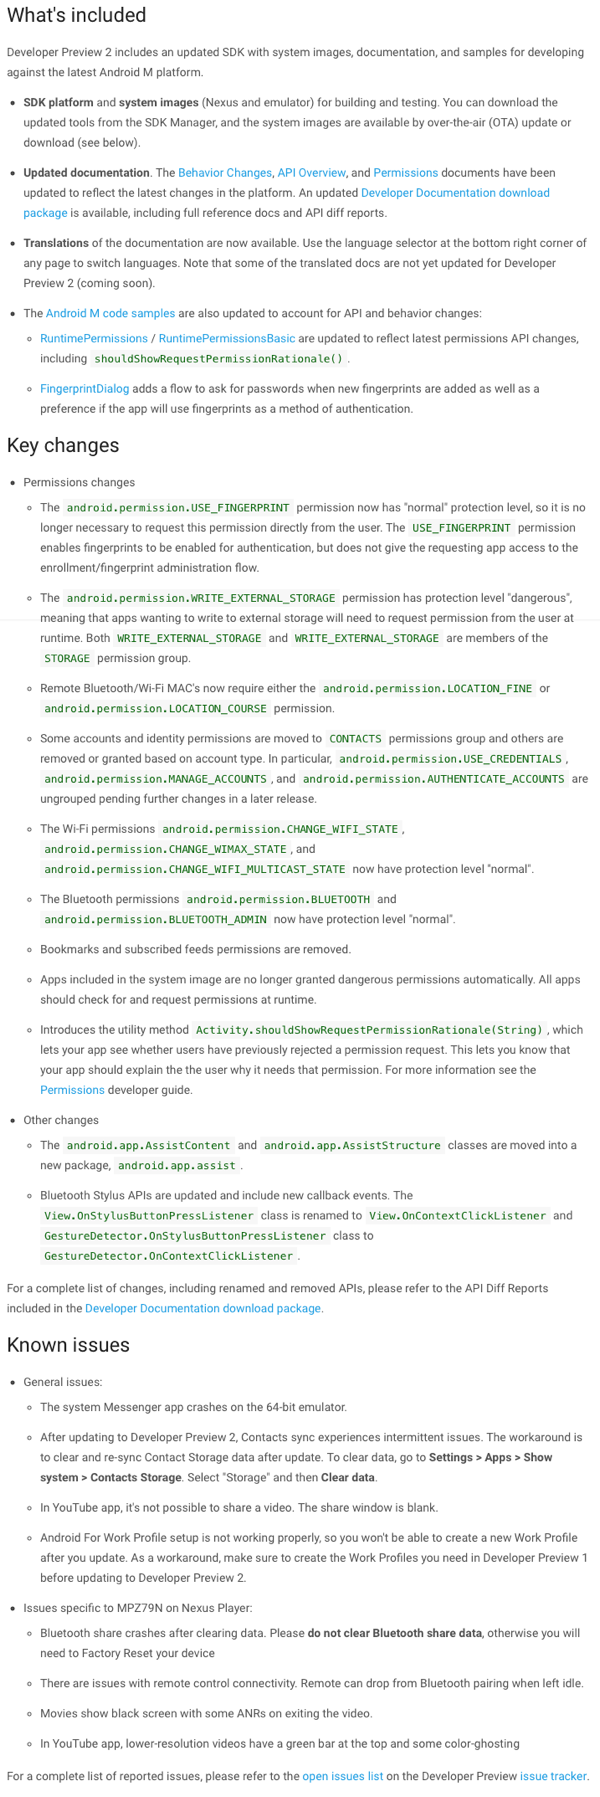
Here is the complete changelog (screenshot below) for Android M Developer Preview 2 update:
The new developer preview build mainly focuses on offering the developers an opportunity to test out existing app compatibilities, or add something entirely new from scratch using the new Android M's API set.
Those who have already installed the first Developer Preview update (aka Developer Preview 1) for Android M on their device can grab the OTA update manually by going to Settings > About Phone > System updates and tapping on Check for Update button.
If you are unable to access or install the OTA update via notification message for some reason, then you can try the manual installation method by downloading the latest preview build of Android M from the following direct download links:
Nexus 5 (hammerhead) Android M Developer Preview build MPZ79M
Nexus 6 (shamu) Android M Developer Preview build MPZ79M
Nexus 9 (volantis) Android M Developer Preview build MPZ79M
Nexus Player (fugu) Android M Developer Preview build MPZ79M
Steps to install Android M Developer Preview 2 factory image on Nexus 5, 6, 9 and Player
Step 1: Download the device-specific Android M factory image for your device from the links provided above.
Step 2: Then you must setup ADB and Fastboot on your computer.
Step 3: Boot the Nexus device into Bootloader mode, before connecting it to the computer.
Step 4: Once in bootloader mode, extract the Android M factory image you downloaded earlier, which will give you a script file named "flash-all" for both Windows and Linux.
Step 5: Double-click on the flash-all.bat file to run it on Windows PC or run flash-all.sh file if you are using Linux. At this moment, the Android M will begin installing on your Nexus device.
Step 6: Wait until the installation completes and let the device reboot automatically.
Note: If you encounter any errors stating "error: update package missing system.img" then try the fix posted here.
[Source: Redmond Pie]
© Copyright IBTimes 2025. All rights reserved.
- MOST READ


