

How to Downgrade iPhone 4 from iOS 7 to iOS 6.1.3 via iFaith [GUIDE] [VIDEO]
iPhone 4 can be downgraded from iOS 7 to iOS 6.1.3 using iFaith
Apple has stopped signing iOS 6.1.3 and iOS 6.1.4 for devices capable of running iOS 7 and users will no longer be able to downgrade their devices running on iOS 7. Besides, Apple has killed the ability to restore custom IPSW for iOS 7 with iTunes 11.1.
However, there is an exception for iPhone 4 users. Those who have saved SHSH blobs for iOS 6.1.3 will be able to downgrade their devices from iOS 7 to iOS 6.1.3 or earlier firmware version using iFaith.
iPhone 4 users who wish to downgrade their devices from iOS 7 to iOS 6.1. 3, may follow our step-by-step guide.
IBTimes UK reminds its readers that it will not be liable for any damage to the device. Users are also advised to verify that their iPhones following set of requirements.
Pre-requisites
1) iFaith (developed by iOS hacker, iH8sn0w) is only for Windows.
2) You can downgrade only if you have iOS 6.1.3 SHSH blobs.
3) This downgrade method is only for iPhone 4. It is not possible to downgrade other iOS 7 compatible devices such as iPhone 5, iPhone 4s, iPad 4, iPad 3, iPad 2, iPad mini and iPod Touch 5G.
4) As the process involves restoring the device with custom iOS firmware file, restoring it from backup will take some time.
5) Once the device is downgraded to iOS 6.1.3, users will be able to restore from an iOS 6.1.3 compatible backup, but not from the iOS 7 backup. So create a backup of data including photos and videos.
6) Although the iOS 7 backup may not be useful once the iPhone is downgraded, it is always recommended that you create a backup using iTunes or iCloud so that users can recover data if something is lost during the downgrade process.
7) The iPhone 4 should have battery charge above 80%.
Steps to downgrade iPhone 4 from iOS 7 to iOS 6.1.3 via iFaith v1.5.9
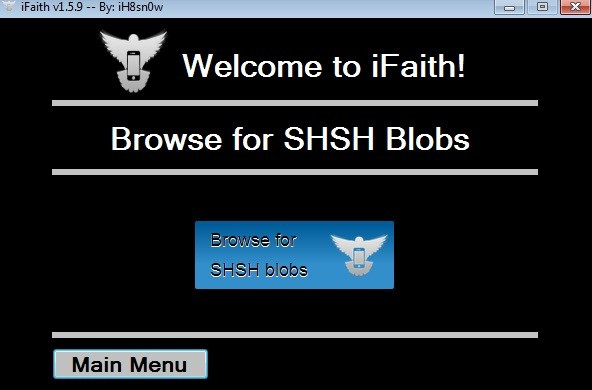
Step-1: Download iFaith v1.5.9 and unzip the file
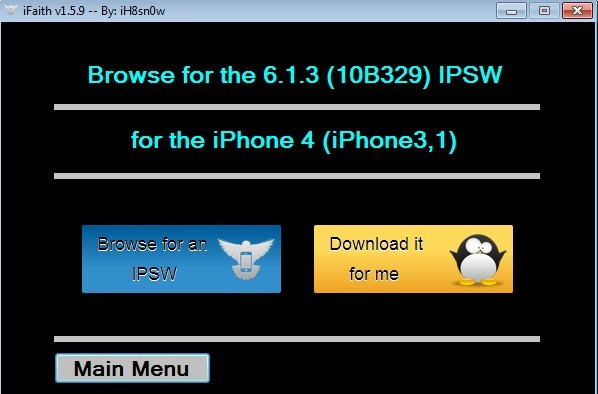
Step-2: Download iOS 6.1.3 firmware for iPhone 4
Step-3: Download iTunes 11.0.5 or lower. This tutorial will not work with iTunes 11.1 or iTunes 11.1.1. Therefore, uninstall iTunes 11.1 or later and download and install iTunes 11.0
iTunes 11.0 for Windows (32-bit)
iTunes 11.0 for Windows (64-bit)
Step-4: Connect the iPhone 4 to computer using USB cable
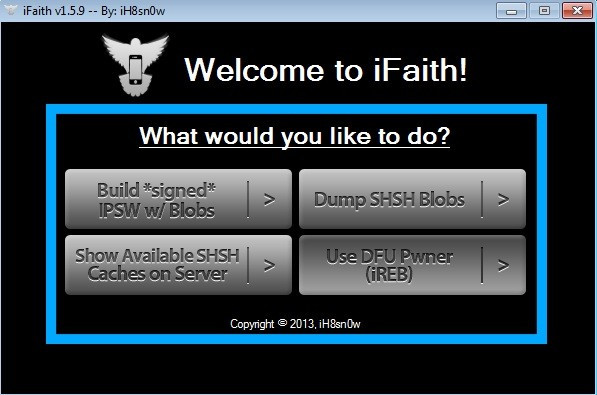
Step-5: Double click on iFaith icon and click OK
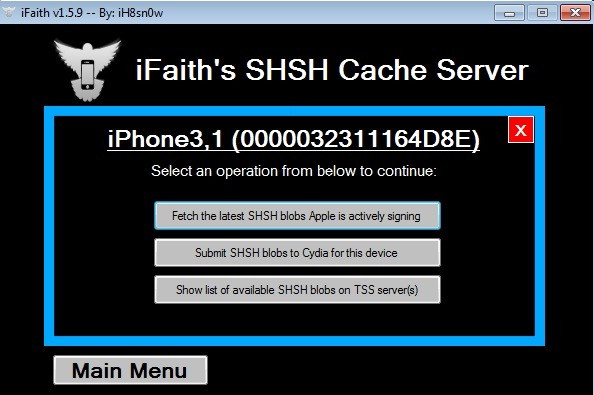
Step-6: Click on Show Available SHSH Caches on Server. It will now prompt if you want to use the newly connected device. Click Yes to continue
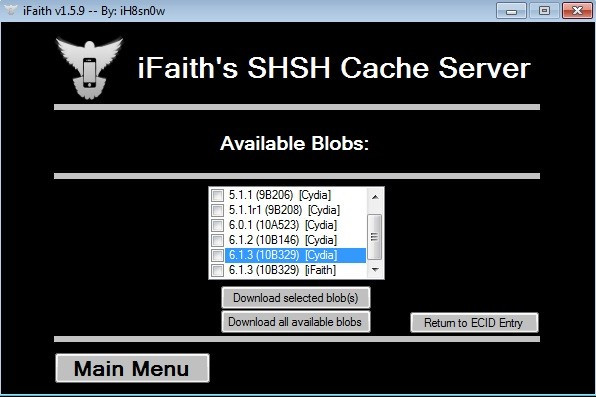
Step-7: Now three options will appear. Click the third option which says Show list of available SHSH blobs on TSS server(s). This will download all the SHSH blobs from Cydia servers and iFaith
Step-8: Select the blob from Cydia or iFaith for iOS 6.1.3 and click on Download selected blobs(s). It will prompt to save the blob locally, select the location on Desktop and click OK
Step-9: This will inform users when the SHSH blob for iOS 6.1.3 download is finished; click OK. This will also inform that it has successfully verified the apt tickets for iOS 6.1.3; click OK
Step-10: It will again prompt if users wish to use the newly connected device, click No to exit iFaith
Step-12: Double click the iFaith icon to launch it again then click OK to continue
Step-13: Click on the Build signed IPSW w/Blobs option. Click Browse for SHSH Blobs and point to the SHSH blob which was downloaded earlier (The file should be with .shsh extension)
Step-14: It will inform saying the provided apt ticket looks valid; click OK to continue
Step-15: Click the Browse for the IPSW option and point it to iOS firmware file which was downloaded earlier, or ask iFaith to download it by clicking on the Download it for me option
Step-16: It will verify the IPSW. If it is the correct version, it will give an option to Build IPSW, click on it to continue
Step-17: iFaith will now build the custom IPSW file using the iOS firmware file and SHSH blob. The process will take some time
Step-18: When the process is completed, it will be indicated by a note saying, finished creating your custom signed IPSW. Note down the file name and click on OK button to proceed
Step-19: Place the iPhone in DFU mode. To do so, turn off the iPhone and click the Start button and follow the on-screen instructions to enter DFU mode
a) Press and hold Power and Home buttons for 10 seconds and then release the Power button
b) Release the Power button while continuing to hold the Home button for another 30 seconds
Step-20: Once the device is detected in DFU mode, it will run iREB and inform that the device is successfully in pwned DFU mode. Click the OK button and OK again to exit iFaith
Step-21: Launch iTunes 11.0. It should prompt saying iTunes has detected in recovery mode. Click OK to continue
Step-22: Hold down the Shift key and click the Restore iPhone button in the Summary pane. Browse to the custom .ipsw file (the file with iFaith and signed in its name) and select it
Step-23: iTunes will take some time to restore the iPhone with custom firmware file. Do not disconnect the phone until the restore has finished
Step-24: When the restore is successful, follow the on-screen instructions on the iPhone to set it up (You may restore from the backup)
The iPhone 4 running on iOS 7 should now be successfully downgraded to iOS 6.1.3.
Also read- Transfer Data from Old iPad to iPad Air via iCloud/ iTunes [How to]
[Source: iPhone Hacks]
© Copyright IBTimes 2025. All rights reserved.
- MOST READ


