

How to Uninstall Windows 10 Technical Preview
Microsoft, last week, announced the availability of Windows 10 Technical Preview, which can be downloaded on desktops and laptops via 'Windows Insider Program', allowing users to get access to the pre-release software with a number of new features.
In case you encounter any issues after installing the update, you can fix them by uninstalling the update. This will, however, roll back to the previous updates. Uninstalling Windows 10 is quite a simple process. Newoin has shared an easy method, backed up with screenshots, to help users uninstall the Technical Preview version.
Here is the guide explaining how to uninstall the Windows 10 Technical Preview.
Steps to uninstall Windows 10 Technical Preview
Step-1: Go to Start menu, click Shut down. Now hold Shift key and select Restart
Step-2: You will now be presented with a screen with a set of options, allowing you to fix the machine
Step-3: From the given options, click on Troubleshoot (Refresh or reset your PC, or, use advanced tool)
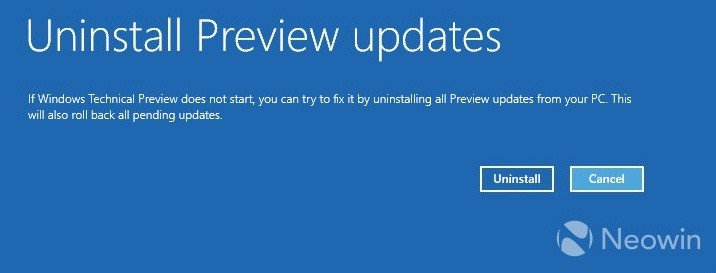
Step-4: Under the Troubleshoot screen there will be a few more options, choose Uninstall Preview updates (if Preview updates prevent Windows Technical Preview from loading, you can uninstall them)
Step-5: After Windows restarts, the Uninstall Preview Update screen will appear, asking you to choose an account to continue
Step-6: On the next screen, enter the password for your user account
Step-7: Click on Uninstall to uninstall the Windows Technical Preview or, Cancel if you wish not to uninstall
All the Preview updates should now have been uninstalled from the machine. Click Restart.
© Copyright IBTimes 2025. All rights reserved.
- MOST READ


