

How to Install Android 5.0.2 (23.1.A.1.28) on Xperia Z2 via rooted stock firmware with recovery pre-installed
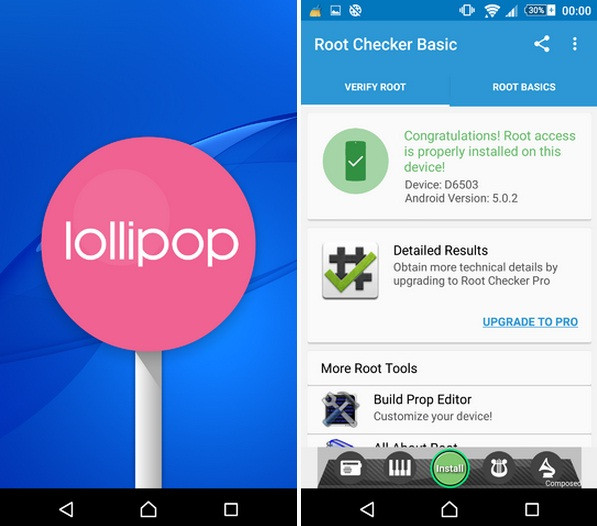
Like the previous Lollipop stock firmware, XDA member nokian70 was quick enough to put out the customised Android 5.0.2 firmware build 23.1.A.1.28 that includes locked recovery v2.8.15 and Chainfire's SuperSU v2.46 for the Xperia Z2 smartphone.
Which means if you want to update your Z2 to the latest stock version, without losing root, the flashable file shared by the member would be a perfect solution. It also has recovery pre-installed, meaning you don't have install recovery separately after installing the stock firmware.
One of the key features is, this rooted firmware will work on Xperia Z2 with locked bootloader. Also, the customised firmware used in this method is a UK generic version.
Check out our following installation guide to manually update the Xperia Z2 with pre-rooted Android 5.0.2 (23.1.A.1.28) firmware having recovery in it.
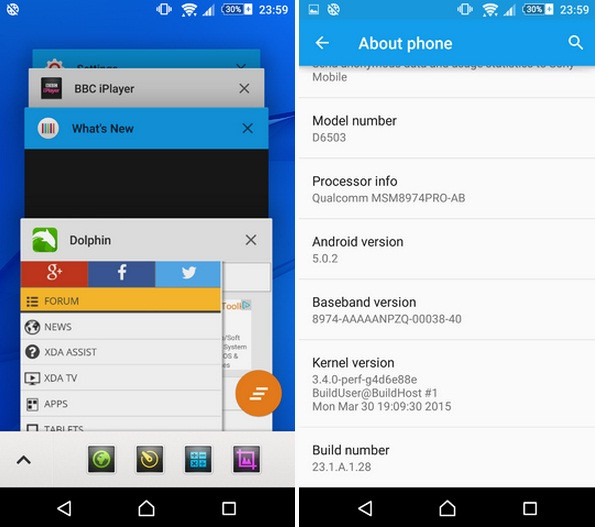
Note that this firmware is meant for Xperia Z2 D6503 model only and applying this on any other model will damage the device. Create a back up of the phone, before jumping directly to the guide and check the battery level of your phone, which should be above 80%.
How to update Xperia Z2 D6503 to rooted Android 5.0.2 (23.1.A.1.28) stock firmware with recovery pre-installed
Step-1: Download rooted Android 5.0.2 (23.1.A.1.28) stock firmware with recovery pre-installed.
Step-2: Transfer the downloaded file to the phone's storage and remember the location.
Step-3: Ensure that you have a custom recovery (TWRP, CWM or, PhilZ) pre-installed on your phone.
Step-4: Boot the phone into recovery mode.
For this first switch off the phone.
Now power on the phone, and press Volume Down button when a green LED light starts flashing.
Note: Instead of Volume Down, you can press Volume Up button to boot into PhilZ touch recovery.
Step-5: In recovery mode, create backup of the existing ROM.
Select Backup and do a swipe on the Swipe to Back Up button.
Wait for a few seconds until the process is completed.
Step-6: Wipe your phone now. Tap on Wipe, then Advanced wipe and select Cache, Dalvik/ART cache and Data. Now swipe on the Swipe to wipe button at the bottom of the screen.
Step-7: Return to the recovery menu and select Install then navigate to the folder where you have saved the pre-rooted stock firmware. Select it and swipe on Swipe to Confirm flash button.
Step-8: When the installation is completed, select Reboot then System to reboot the phone.
When the phone boots up successfully, it should be up and running with the rooted stock Lollipop firmware.
Head over to XDA thread to know more about the pre-rooted firmware.
© Copyright IBTimes 2025. All rights reserved.
- MOST READ


