

DJI Phantom 4: Here's how to set up your new drone and update the firmware
The set up process is different to its predecessor

So you've just shelled out an epic £1,229 (or $1,399 outside Europe) for your DJI Phantom 4 drone and you're excited to get it into the air – but you don't know how, because the set-up process is different to that of its predecessor, the Phantom 3 series.
Never fear, IBTimes UK is here to the rescue with a handy step-by-step guide that takes you through those pesky firmware updates and compass calibration, as well as explaining how you can access some of the new nifty avoidance and user-tracking functions.
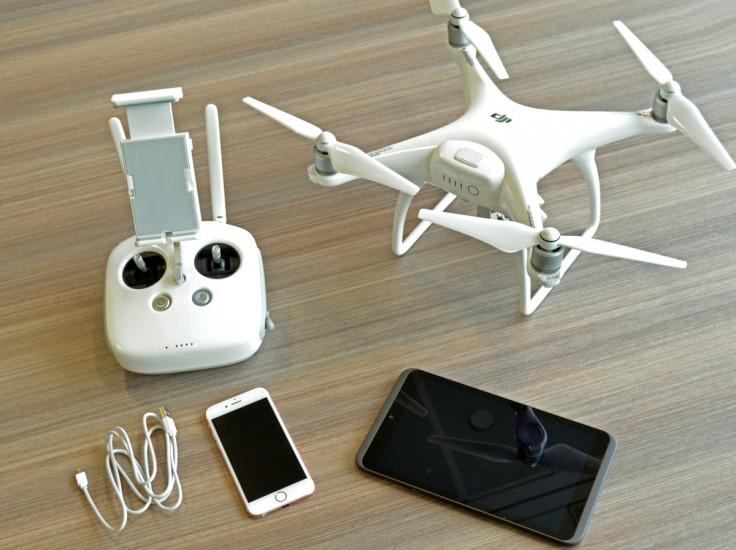
Step One: Charge everything
The first thing you want to do, preferably the day before you want to take your drone out, is to charge absolutely everything. By everything we mean: the remote controller, the aircraft's battery (no, Phantom 3 batteries will not work with the Phantom 4), your tablet and your smartphone, in case you to look something up on Google when you're out in the field for the first time, because you might well need to.
Step Two: Download DJI Go App and DJI Assistant 2 software
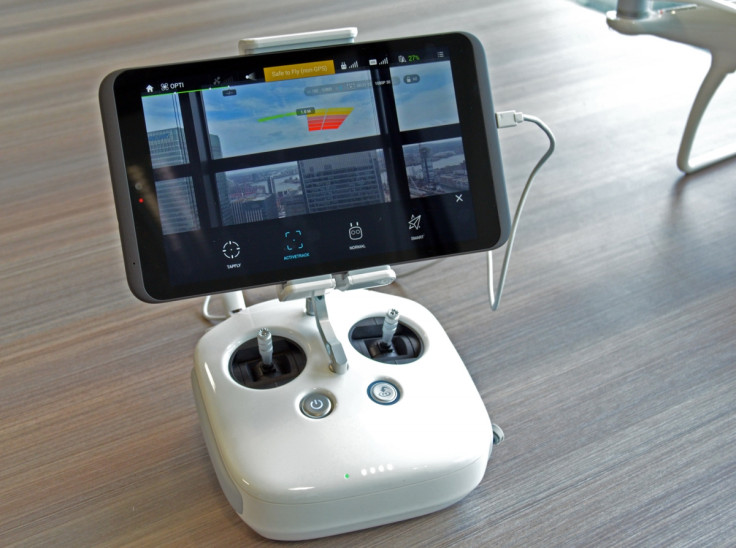
In order to fly the Phantom 4, you'll need to download the DJI Go app onto your tablet from Google Play or the iOS App Store. It is used as a view finder on the controller when you're flying the drone. You can use a smartphone, but a tablet is bigger and it's easier for you to see the drone functions, as well as where the drone is going.
Search for DJI Go in the app store, and if you already have the DJI Go app on your tablet from flying the Phantom 3 series drones, simply select "Update".
You will also need to download the DJI Assistant 2 software to your PC or Mac so that you can update the firmware of the Phantom 4 drone, which you can download from the Phantom 4 Downloads section here.
Step Three: Update the aircraft's firmware
In order to do this, you will need to turn the drone on and then link it into your PC or Mac using the white USB cable. You also need to make sure that your computer has a good internet connection, as the firmware update can take a while.
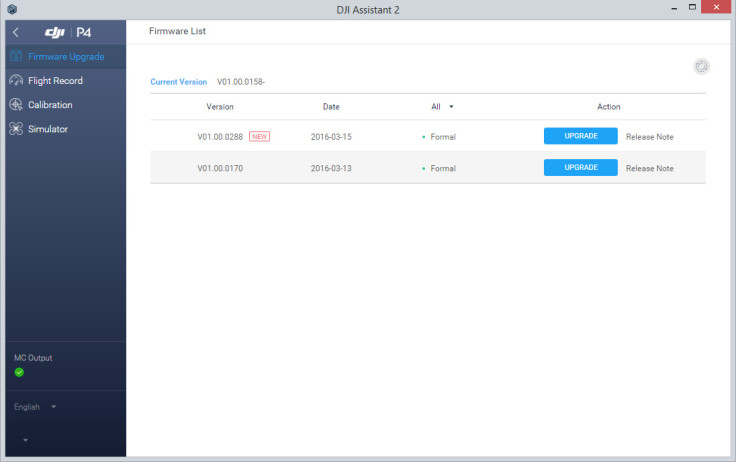
When you're ready, launch the DJI Assistant 2 software and the DJI Phantom 4 should be recognised. Double-click the icon and you can then select "Firmware Upgrade" on the left-hand panel. Select the most recent version of the firmware listed and click the "Upgrade" button. You only need to install the firmware at the top of the list; ignore any other entries.
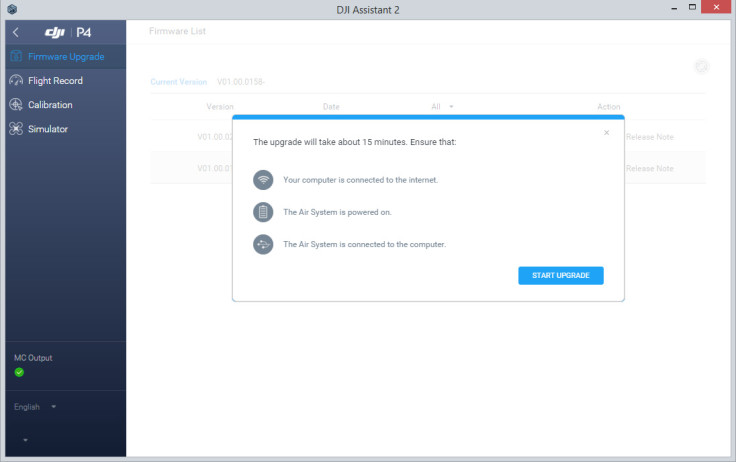
If the firmware doesn't download or stops downloading, you will need to check your internet connection. Once it has downloaded, select the "Update" button. If the update process stays at 0% and clearly isn't updating after a while, you will need to close the DJI Assistant 2 software (including go into Task Manager and make sure the process is no longer running).
Then unplug the drone's USB cable, plug it in again and then launch the Assistant 2 software once more.
Step Four: Calibrate the compass
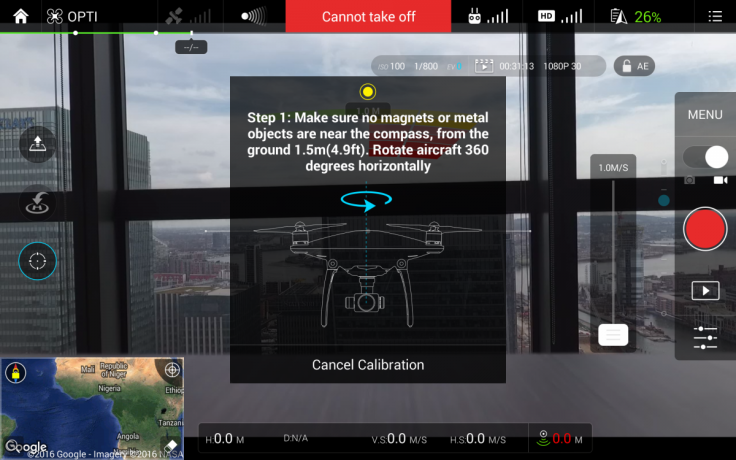
Once everything's updated, you're ready to head outside (somewhere far away from people, buildings, airports or restricted zones). Don't bother calibrating the compass with the Assistant 2 software as it is not very intuitive, and you will have to calibrate it again when you get outside anyway.
When you get to where you want to use the drone and have turned on the controller, aircraft, tablet and have the DJI Go app running, then follow these instructions to calibrate the compass.
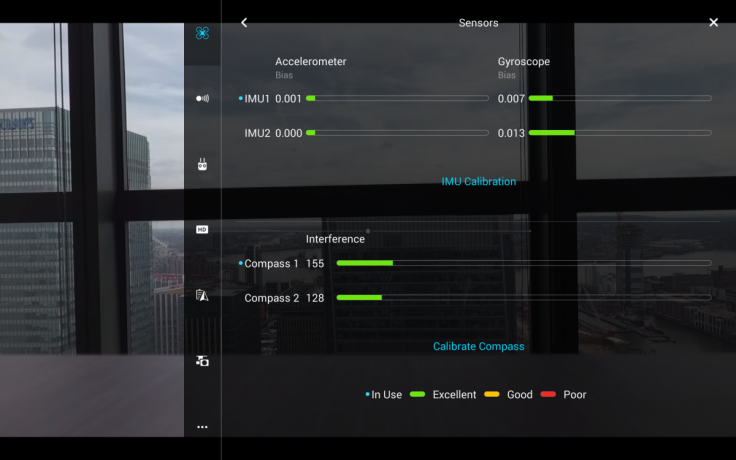
In the DJI Go app, go to the top right-hand corner and select the menu, which pulls out a big menu of settings. Click on the icon on the left that looks like a quadcopter, which pulls up the "Main Control Settings". Click on "Advanced Settings" and then select "Sensors".
In the Sensors menu you will find an option that says "Calibrate Compass". This then activates the Calibration tutorial which guides you through the process on screen, just make sure that there are no magnets or electronic equipment nearby.
Step Five: Make sure to turn on Active Tracking and Obstacle Avoidance
The cool thing that makes the Phantom 4 drone different from its predecessors is it comes with Active Tracking, that allows the drone to follow you around and film you (similar to the selfie drones like Zano and Lily that have captured consumers' attention), and the obstacle avoidance technology, which if set correctly, should enable you to keep any children or adults who get close to the drone safe.
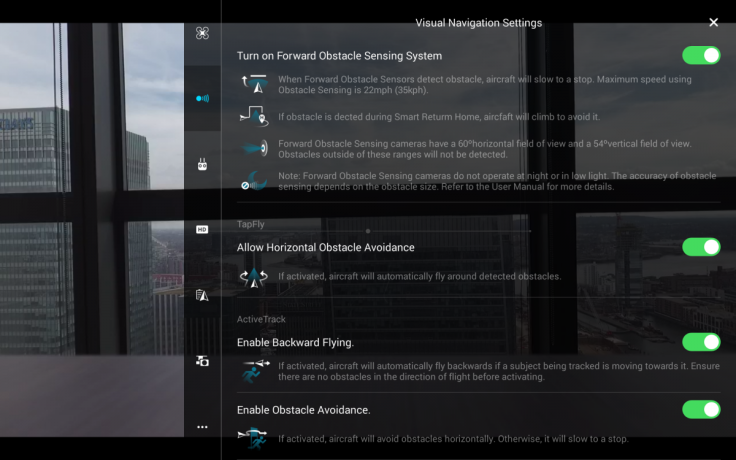
To do this, in the DJI Go app, go to the top right-hand corner and select the menu, which pulls out a big menu of settings. Click on the icon on the left that looks like a ball emitting signals. This is the "Visual Navigation Settings" menu.
Make sure that you turn on every single setting in this menu, including "Enable Backward Flying", but make sure that there are no obstacles behind the drone when you do this, as it only has camera "eyes" at the front of the drone, where the 4K camera and gimbal is facing.
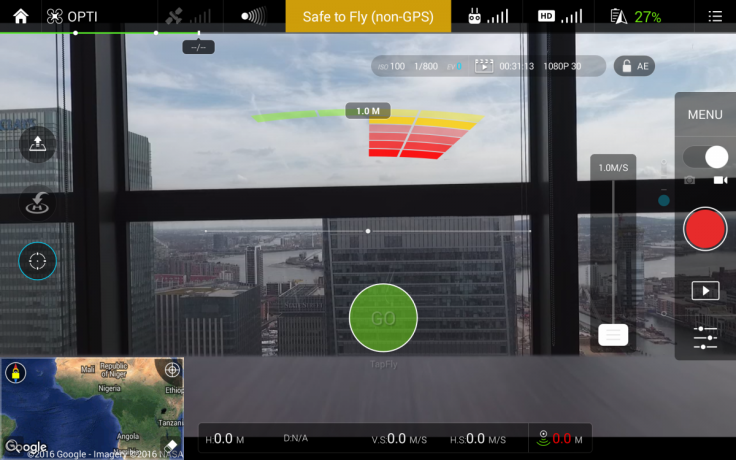
When you're ready to fly, go back to the main camera mode and click on the icon shaped like a bullseye, which is third from the top on the left-hand side of the screen. This brings up a menu with four buttons: Tap Fly (where the drone automatically flies to a point you indicate on the screen), Active Track (where the drone tracks your every move), Normal and Smart.
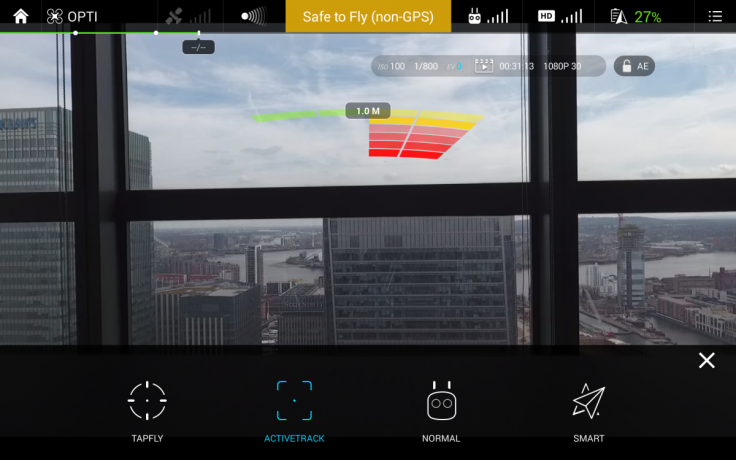
The obstacle avoidance technology will now be on and if someone walks towards the drone, it should stop 1m away and refuse to move, and if you fly it into a tree or bush, it will refuse to go forward and instead look for a way around the obstacle.
Have fun, and stay safe!
© Copyright IBTimes 2025. All rights reserved.
- MOST READ


