

Nexus 4 gets Android 6.0 Marshmallow update unofficially

Google stopped any further Android support for its 2012 Nexus models - Nexus 4 and 7 - leaving them on the older Android Lollipop. But as long as the developer community continues developing custom firmware based on the newest Android Marshmallow for these Nexus models, they can experience the new Android version, albeit unofficially.
Developer Dmitry Grinberg is the first one to jump into the development of the custom ROM for Nexus 4. He has baked a pre-built AOSP Marshmallow ROM for Nexus 4. Additionally, he has shared a detailed instruction guide explaining how to build the Android Marshmallow ROM. As the Nexus 4 is originally a Google-Play equipped device, you can install Google Apps of the AOSP image and thereby enjoy the full Android Marshmallow experience on the phone.
But note that you need to have TWRP recovery on the Nexus phone to install the Gapps package. Also, the AOSP ROM supports D820 and D821 variants for Nexus 4. Proceed with the installation at your risk, as we will not be held liable for any damage that occurs during the installation.
Download files:
Android 6.0 Marshmallow AOSP ROM
How to install Android 6.0 Marshmallow ROM on Nexus 4 via pre-built AOSP ROM
Step-1: Extract the downloaded ROM to get fastboot files such as system.img, boot.img and the radio folder containing two modem files
Step-2: Choose the modem file you want to flash on Nexus 4. Select the normal one in case you don't want LTE. Then rename the file to modem.img
Step-3: Create a folder named Nexus 4 update (or, anything you want) and move all the files - system.img, boot.img and modem.img - into it
Step-4: Connect your Nexus 4 to the PC via USB cable. Copy the Gapps file to the phone's storage and remember the location. Then disconnect the phone
Step-5: Boot the phone into booatloader mode. Use Quick Boot app to boot into bootloader mode, if your phone is rooted. Alternatively, do the following steps to manually place it in bootloader mode
- Switch off the phone
- Press Volume up and Power buttons together until you see some text on the screen. This is bootloader mode and on top of the screen you should see FASTBOOT written on it
- Use the Volume down button to go to recovery mode and Power button to select it and boot into recovery
Step-6: Open a command prompt in the Nexus 4 update folder that contains all the .img files
- Open the folder, hold Shift key and right-click on an empty space insider the Nexus 4 update folder. A drop-down menu will appear, select the Open command prompt windows here option
Step-7: Execute the following commands to install the Marshmallow update on Nexus 4
- fastboot flash boot boot.img
- fastboot reboot bootloader
- fastboot flash radio modem.img
- fastbpoot reboot bootloader
- fastboot flash system system.img
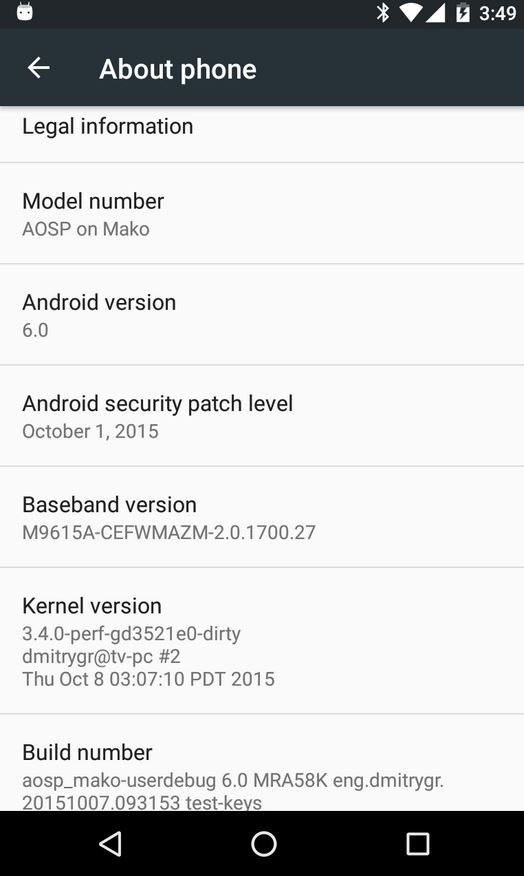
Wait until the phone finishes booting up to the new ROM. This process will take a few minutes. Now go to Setting>> About phone to check the new Android version on your Nexus 4.
If you happen to get force close issue on apps or if the phone lags after the update, just perform a factory reset via TWRP recovery. Now you need to flash the Gapps file, for which ensure that your device has TWRP recovery.
How to flash Gapps
Step-1: Enter into recovery mode
Step-2: Create a backup in TWRP recovery mode. Tap on Backup then select all the partitions and do a swipe on the bottom of the screen to create a backup
Step-3: Return to the recovery menu and select Install; head over to the folder where you have saved the Gappa file, select it and confirm installation
Step-4: When the installation is completed, tap on Reboot system
If you have performed all the above steps correctly, your Nexus 4 should now be running Android Marshmallow. Head over to the development thread at Dmitry Grinberg's site to know more about the Android Marshmallow ROM.
© Copyright IBTimes 2025. All rights reserved.
- MOST READ


