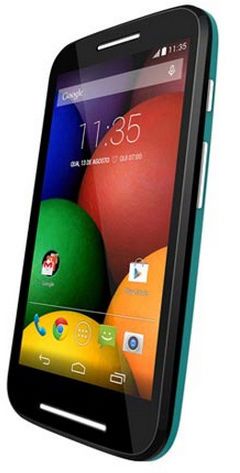
Moto E: Simple Guide to Unlock Bootloader, Root and Install Custom Recovery

The Moto E has received rave reviews from around the mobile industry as it has been able to offer a high-value smartphone at an extremely affordable price point. For those of you who intend to unlock the handset's bootloader, root it and install a custom recovery, here is a simple guide to do just that.
IBTimes UK reminds its readers that it will not be held liable for any damage to device during or after root installation. Users are advised to proceed at their own risk.
Unlocking the Bootloader
Users can unlock the smartphone's bootloader by visiting Motorola's own support page. Users should be able to perform an unlock with relative ease with the instructions there.
The company can take pride in the fact that the Moto E is one of the first budget handsets with an official bootloader unlock method provided by the manufacturer itself.
Rooting The Moto E
Pre-Requisites
1) The phone's battery must have at least 80% of charge.
2) USB debugging should be turned "ON".
3) Users should have Motorola USB drivers installed on their computers. They can be downloaded from here.
4) Apart from this, the Android SDK must be installed on the computer as well.
Step 1: Connect your phone to your computer through a USB cable. Turn on USB debugging mode on your Moto E. This can be done by going to Settings > About Phone > scroll to the bottom > press Build number seven times. If you did that properly, a pop-up will tell you that you're now a developer.
Step 2: Head back and open up the Developer options menu. Tick 'USB debugging' and hit 'OK' when prompted.
Step 3: Users must now open up the terminal on Windows 7. Press the 'Windows' key, punch in 'cmd', and hit Enter. For those of you using Windows 8, go to the new Modern UI home panel, and simply key in 'cmd' there.
Once the terminal is up and running, users must change the folder to Platform Tools in the Android SDK. In most cases, this is what it should look like:
C:/Android SDK/adt-bundle-windows-x86_64-20131030/sdk/platform-tools/
To change the folder, simply copy the above path (as on your PC) and add 'cd' in front of it so that it becomes:
cd C:/Android SDK/adt-bundle-windows-x86_64-20131030/sdk/platform-tools/
Step 4: It's time to start entering commands. Type the following in the command line:
adb devices
Press 'Enter', and the following should appear:
List of devices attached
TA8900F944device
The code will differ depending on your device.
Following this, type in:
adb reboot bootloader
This command will cause your phone to reboot in bootloader mode. Please wait for a few moments and you will see the bootloader menu.
Now type the following into the terminal:
fastboot oem get_unlock_data
This will churn out about five lines of code, which should look similar to this:
(bootloader) 3A54756615784488#5441383833304C (bootloader) 47325600585431303222000000#361D (bootloader) 7293361E178D7D591294131B57789CA (bootloader) 86EC4#C39412020F000000000000000 (bootloader) 0000000 OKAY [ 0.164s] finished. total time: 0.164s
Copy and save this code, since it is your unique phone identifier. You must only copy the numbers after the word 'bootloader.'
Right click anywhere in the terminal, choose Mark, and select the entire chunk of text. Press enter. All this copied text will now be on the clipboard. Paste the copied text on to Notepad and delete everything except the numbers. Combine all numbers together and the result should look like this:
3A8872061004488#5441381133304C47325600585431303332000000#361D7293361E178D7D591294131B57789CA86EC4#C39222020F0000000000000000000000
Step 5: Head over to Motorola's official website and move to step number 6 in the process.
Step 6: Copy the long string and paste it before clicking the "Can my device be unlocked?" button. Ensure that you have taken out all blank spaces from the copied string. Users will now get a green light to get their bootloader unlocked.
Step 7: You should have received a 20-character key from Motorola via email. Copy it. Head over to your terminal, with your phone still connected via USB, and type:
fastboot devices
Then type:
fastboot oem unlock UNIQUE_KEY
In the place of "UNIQUE KEY" type the massive code from Motorola that you just copied.
Step 8: If you did everything properly, your Moto E should have started rebooting itself and your bootloader should be unlocked.
Following this, users should flash TWRP Recovery and Super SU.
Instructions For First Timers
- Download and extract mfastboot-v2 to your computer;
- Download TWRP recovery for Moto E. Change the name to recovery-twrp.img. Move it to the folder in which the mfastboot-v2 pack was extracted.
- Download SuperSU. Take it from your computer and place it in the base folder of your Moto E.
- Press VolumeDown+Power button for a few seconds (Moto E should be connected to your computer)
- On your computer, navigate to the folder that contains the extracted mfastboot-v2 pack. Hit Shift+RightClick in an empty area. Choose "Open a command window here" option.
- By running the following command, users can simply boot into recovery to rooting purposes.fastboot boot recovery-twrp.img
- However, if you want to permanently install TWRP, then enter:fastboot flash recovery recovery-twrp.img
- In about a minute, the screen should go blank. Press the power key and make a swipe on the screen. This will restore the touch functionality.
- Pick "Install" from the options list. Navigate to the SuperSU file that you placed in the handset's root folder.
- Now perform a swipe to initiate the flashing process. Give it some time to complete. After this, select reboot.
- Navigate to the Main Menu, search for the Super SU icon. If you can spot it, then congratulations, your Moto E has been rooted.
Source: via XDA Devs and PhoneArena.
© Copyright IBTimes 2025. All rights reserved.


