Sony Xperia Z Gets Android 4.4 KitKat via AOSP ROM [How to Install]
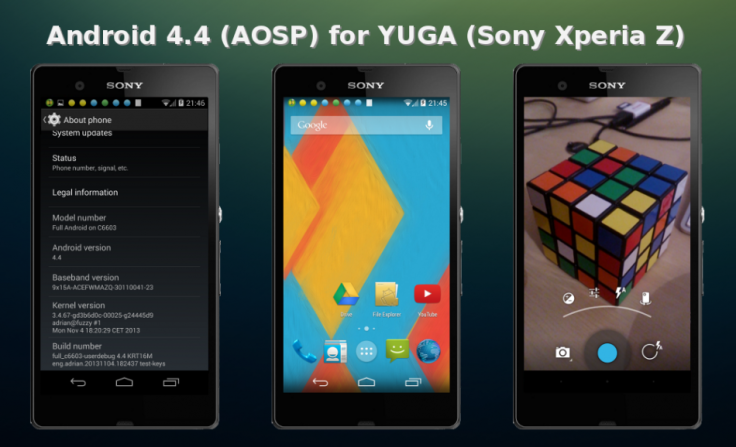
Android 4.4 AOSP ROM offers fast and stable experience with Sony Xperia Z

Google has officially announced the launch of Android 4.4 KitKat for its Nexus line of devices, while third-party Android developers have already released a range of custom ROMs for Nexus devices including Nexus 4, Nexus 7 (first and second generation) and Galaxy Nexus (GSM and Verizon).
Sony Xperia Z is among the latest to join the league of Android 4.4 KitKat via AOSP ROM, thanks to the industrious efforts of XDA Senior member pabx. The ROM is built from original AOSP source without the inclusion of recovery or root.
Though the custom ROM may harbour a few untested bugs or broken features, the developer has confirmed that the ROM is quite stable with all the phone's core features found to be fully functional.
In other words, the following phone features have been tested and found to be working correctly:
- WiFi
- Audio
- Camera and movie recording
- Telephone calls and SMS
- GSM Data
- GPS
- NFC
- Encrypted Data
- OMX video (HW accelerated playback)
- Automatic display brightness
- No screen on delay
Known Bugs and Fixes
- Choosing a mobile network manually will result in "Please wait..." dialog to appear even after the phone is registered to the network. Just hit the Home button once to dismiss the dialog-box.
- Syncing the Calendar with Google may not work on a fresh Android 4.4 installation. Just reboot your phone a couple of times and the issue should be fixed.
NOTE: Instructions provided in this guide are meant for reference purpose only. IBTimes UK will not be held liable for any device damage during or after firmware installation. Users are advised to proceed at their own risk.
Head over to the XDA Developers source page to learn more about the features, bug-fixes and enhancements ported into this ROM.
Pre-requisites
- The Android 4.4 AOSP ROM and the instructions provided are limited to the Sony Xperia Z model. Verify device model number by navigating to Settings > About Phone.
- Back up data and settings using a recommended custom recovery tool such as ClockworkMod (CWM) or TWRP, as data wiping process is mandatory in this tutorial.
- Verify appropriate USB drivers are installed on the computer (Download Sony Xperia Z USB drivers).
- Ensure USB debugging mode is enabled on phone by navigating to Menu > Settings > Applications > Development option.
- Double-check that phone has at least 80% battery charge to prevent unexpected device shutdown (due to battery drain) while installing ROM.
- Verify if the device is unlocked (not locked to specific carrier) and rooted with ClockworkMod Recovery (CWM) installed.
- If the device is stuck at booting or experiences boot loop issues, Wipe Cache Partition and Wipe Dalvik Cache a few more times before rebooting.
- Allow newly installed ROM tostabilise for five minutesbefore using the device.
- If a Status 7 error message flashes while installing firmware, it could be due to an incompatible device or absence of a necessary kernel (for instance, a Jelly Bean Kernel must be installed before installing any Jelly Bean ROM).
Steps to Install Android 4.4 KitKat via AOSP ROM on Sony Xperia Z
Step-1: Download Android 4.4 AOSP ROM for Sony Xperia Z and Google Apps on computer.
Step-2: Connect your Xperia Z to computer via USB cable. Without extracting the zip file, copy the downloaded firmware zip file to the root folder on phone's SD card.
Step-3: Disconnect the phone from computer and then Power it off.
Step-4: Boot the Xperia Z into recovery mode by pressing and holding Volume Up, Home and Power buttons together. The recovery mode will appear soon.
Note: In recovery mode, use Volume buttons to navigate between options and Power button to select the desired option.
Step-5: In recovery mode first perform a Nandroid backup of the existing ROM which can be restored later if the new ROM does not work or users want to return to the previous firmware. To perform a Nandroid backup, select Backup and Restore then select Backup again on the next screen. When backup is completed return to the main recovery menu.
Step-6: Perform data wiping task to eliminate clash between the new ROM and the previous ROM. Select wipe data/factory reset then select Yes on the next screen to confirm the action. Then select wipe cache partition and after the wiping process completes select Wipe Dalvik Cache under advance option. Once the wiping process is done, go back to the recovery menu.
Step-7: Select Install Zip from SD card then select Choose Zip from SD card. Now locate the Android 4.4 AOSP ROM zip which was earlier copied to the phone's SD card. Press the Power button to select it and confirm installation on next screen.
Step-8: Once the installation process is completed, return to the main recovery menu and reboot the phone by choosing reboot system now. The first boot will take some time.
The Xperia Z should now be successfully updated with Android 4.4 AOSP ROM. Navigate to Menu >> Settings >> About phone >> Software info to verify the new firmware running on the device.
Note: To go back to the previous ROM, boot the Xperia Z into recovery mode. Then select Backup and Restore and restore the ROM by selecting it from the list.
Also Read: How to Update Galaxy Nexus I9250 to Android 4.4 KitKat via AOSP ROM [GUIDE]
© Copyright IBTimes 2025. All rights reserved.
- MOST POPULAR IN Technology