

Root Galaxy Note 8.0 GT-N5100 on all Android 4.4.2 KitKat Firmware


Samsung has just started rolling out Android 4.4.2 KitKat update with base firmware build N5100XXDND8 for the international variant of Galaxy Note 8.0 (GT-N5100).
Those who have already updated their Galaxy Note 8.0 to the latest KitKat stock firmware can follow our step-by-step guide to root the same via CF-Auto-Root from senior XDA recognised developer, Chainfire.
Head over to the official developer thread to learn more about the root method and its features.
Note: Rooting a device is essential to install third-party root apps, latest custom ROMs and system tweaks for optimum performance. Warranty status of the device will be void after rooting any device. However, you can restore the warranty status by reinstalling the latest stock/official firmware from Samsung.
IBTimes UK reminds its readers that it will not be held liable for any device damage during or after root installation. Users are advised to proceed at their own risk.
Pre-requisites
1. Install necessary USB Drivers for Samsung Galaxy Note 8.0 GT-N5100 on the computer.
2. Enable USB Debugging Mode on the tablet by going to Settings >> Developer Options.
3. Back up of all your important data before proceeding with the root installation.
4. Ensure the Galaxy Note 8.0 is factory unlocked and not locked to any specific carrier.
5. Verify the phone's battery has at least 80 per cent charge.
6. The CF-Auto-Root is compatible only with Samsung Galaxy Note 8.0 N5100. Applying this to any incorrect variant might brick the device. Verify the model number of the Galaxy Note 8.0 by navigating to Settings >> About Phone.
Downloads Required
CF-Auto-Root for Galaxy Note 8.0 GT-N5100
Odin v3.09
Steps to Root Galaxy Note 8.0 N5100 Running on Android 4.4.2 Stock Firmware
Step 1: Extract CF-Auto-Root and Odin 3.09 files via WinRAR/7-Zip/WinZip or any other extracting tool.
Step 2: Power off the Galaxy Note 8.0 and boot the device into Download Mode as follows: press and hold Volume Down, Home and Power buttons together until a construction Android robot icon with a warning triangle appears on screen. Then tap Volume Up button to enter Download Mode.
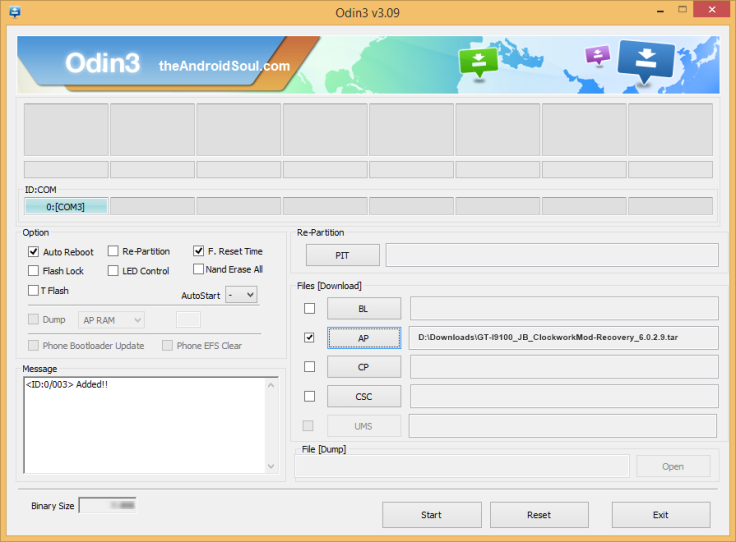
Step 3: Launch Odin on computer as Administrator.
Step 4: Connect Galaxy Note 8.0 to computer via USB cable while it is still in Download Mode. Wait until Odin detects the device and ID: COM box turns blue with the corresponding COM port number. When the device is connected successfully, a message saying "Added" appears on screen.
Step 5: In Odin, tap AP button and choose the CF-Auto-Root-kona3g-kona3gxx-gtn5100.tar.md5 file.
Step 6: Ensure Auto Reboot and F. Reset Time options are selected in Odin, while the Re-Partition option is unchecked.
Step 7: Verify step 6 and then click Start in Odin. Now the root installation process begins.
Step 8: Once the root installation is done, your phone will reboot and soon a PASS message with a green background appears in the left-most box at the very top of Odin. You can now disconnect the USB cable to remove your device from the computer.
Samsung Galaxy Note 8.0 N5100 is now rooted on Android 4.4.2 KitKat stock firmware. It is now possible to install any app that requires root permission. Verify the root status of the device by downloading and installing Root Checker app from Google Play Store.
[Source: Honai of Android]
© Copyright IBTimes 2025. All rights reserved.
- MOST READ


